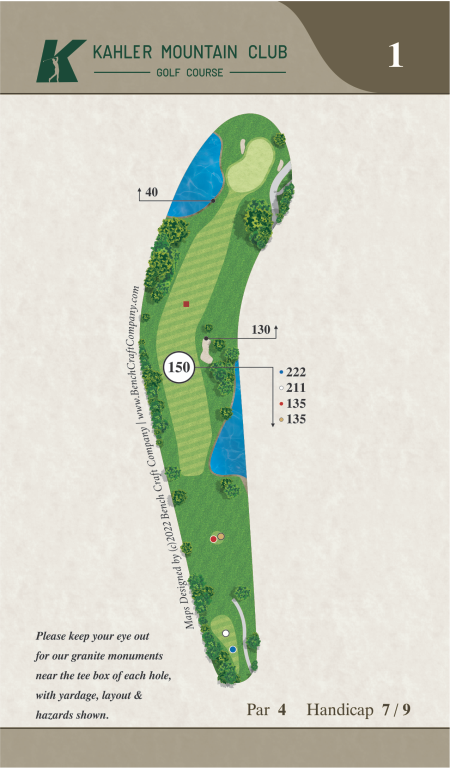
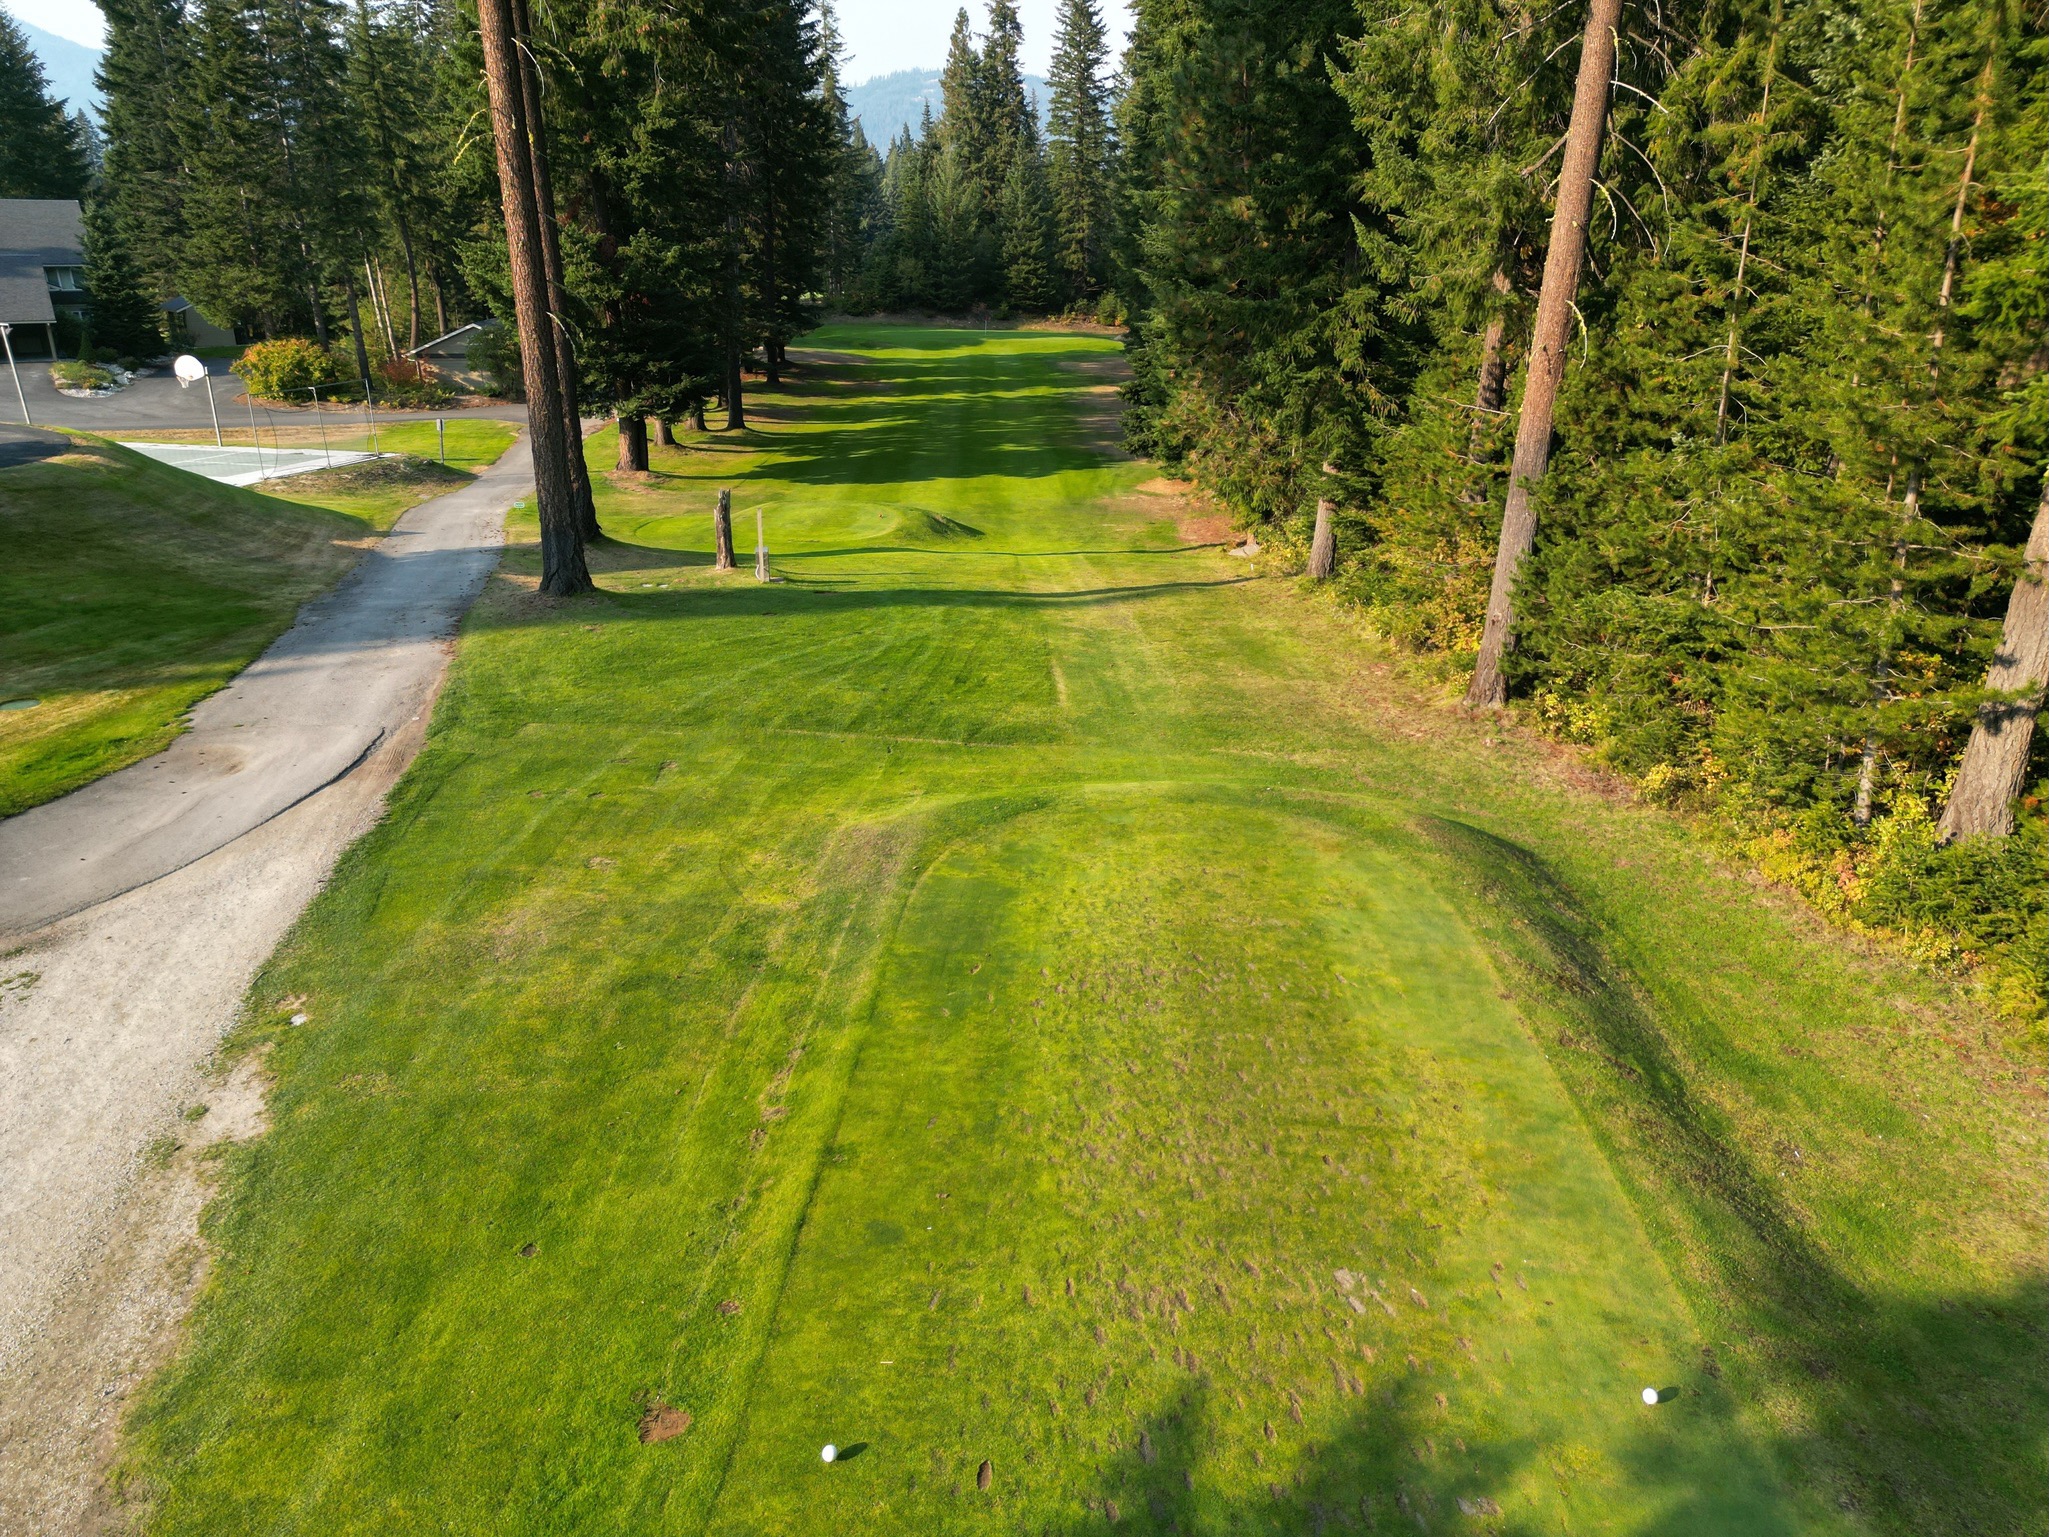


Hole 1
-
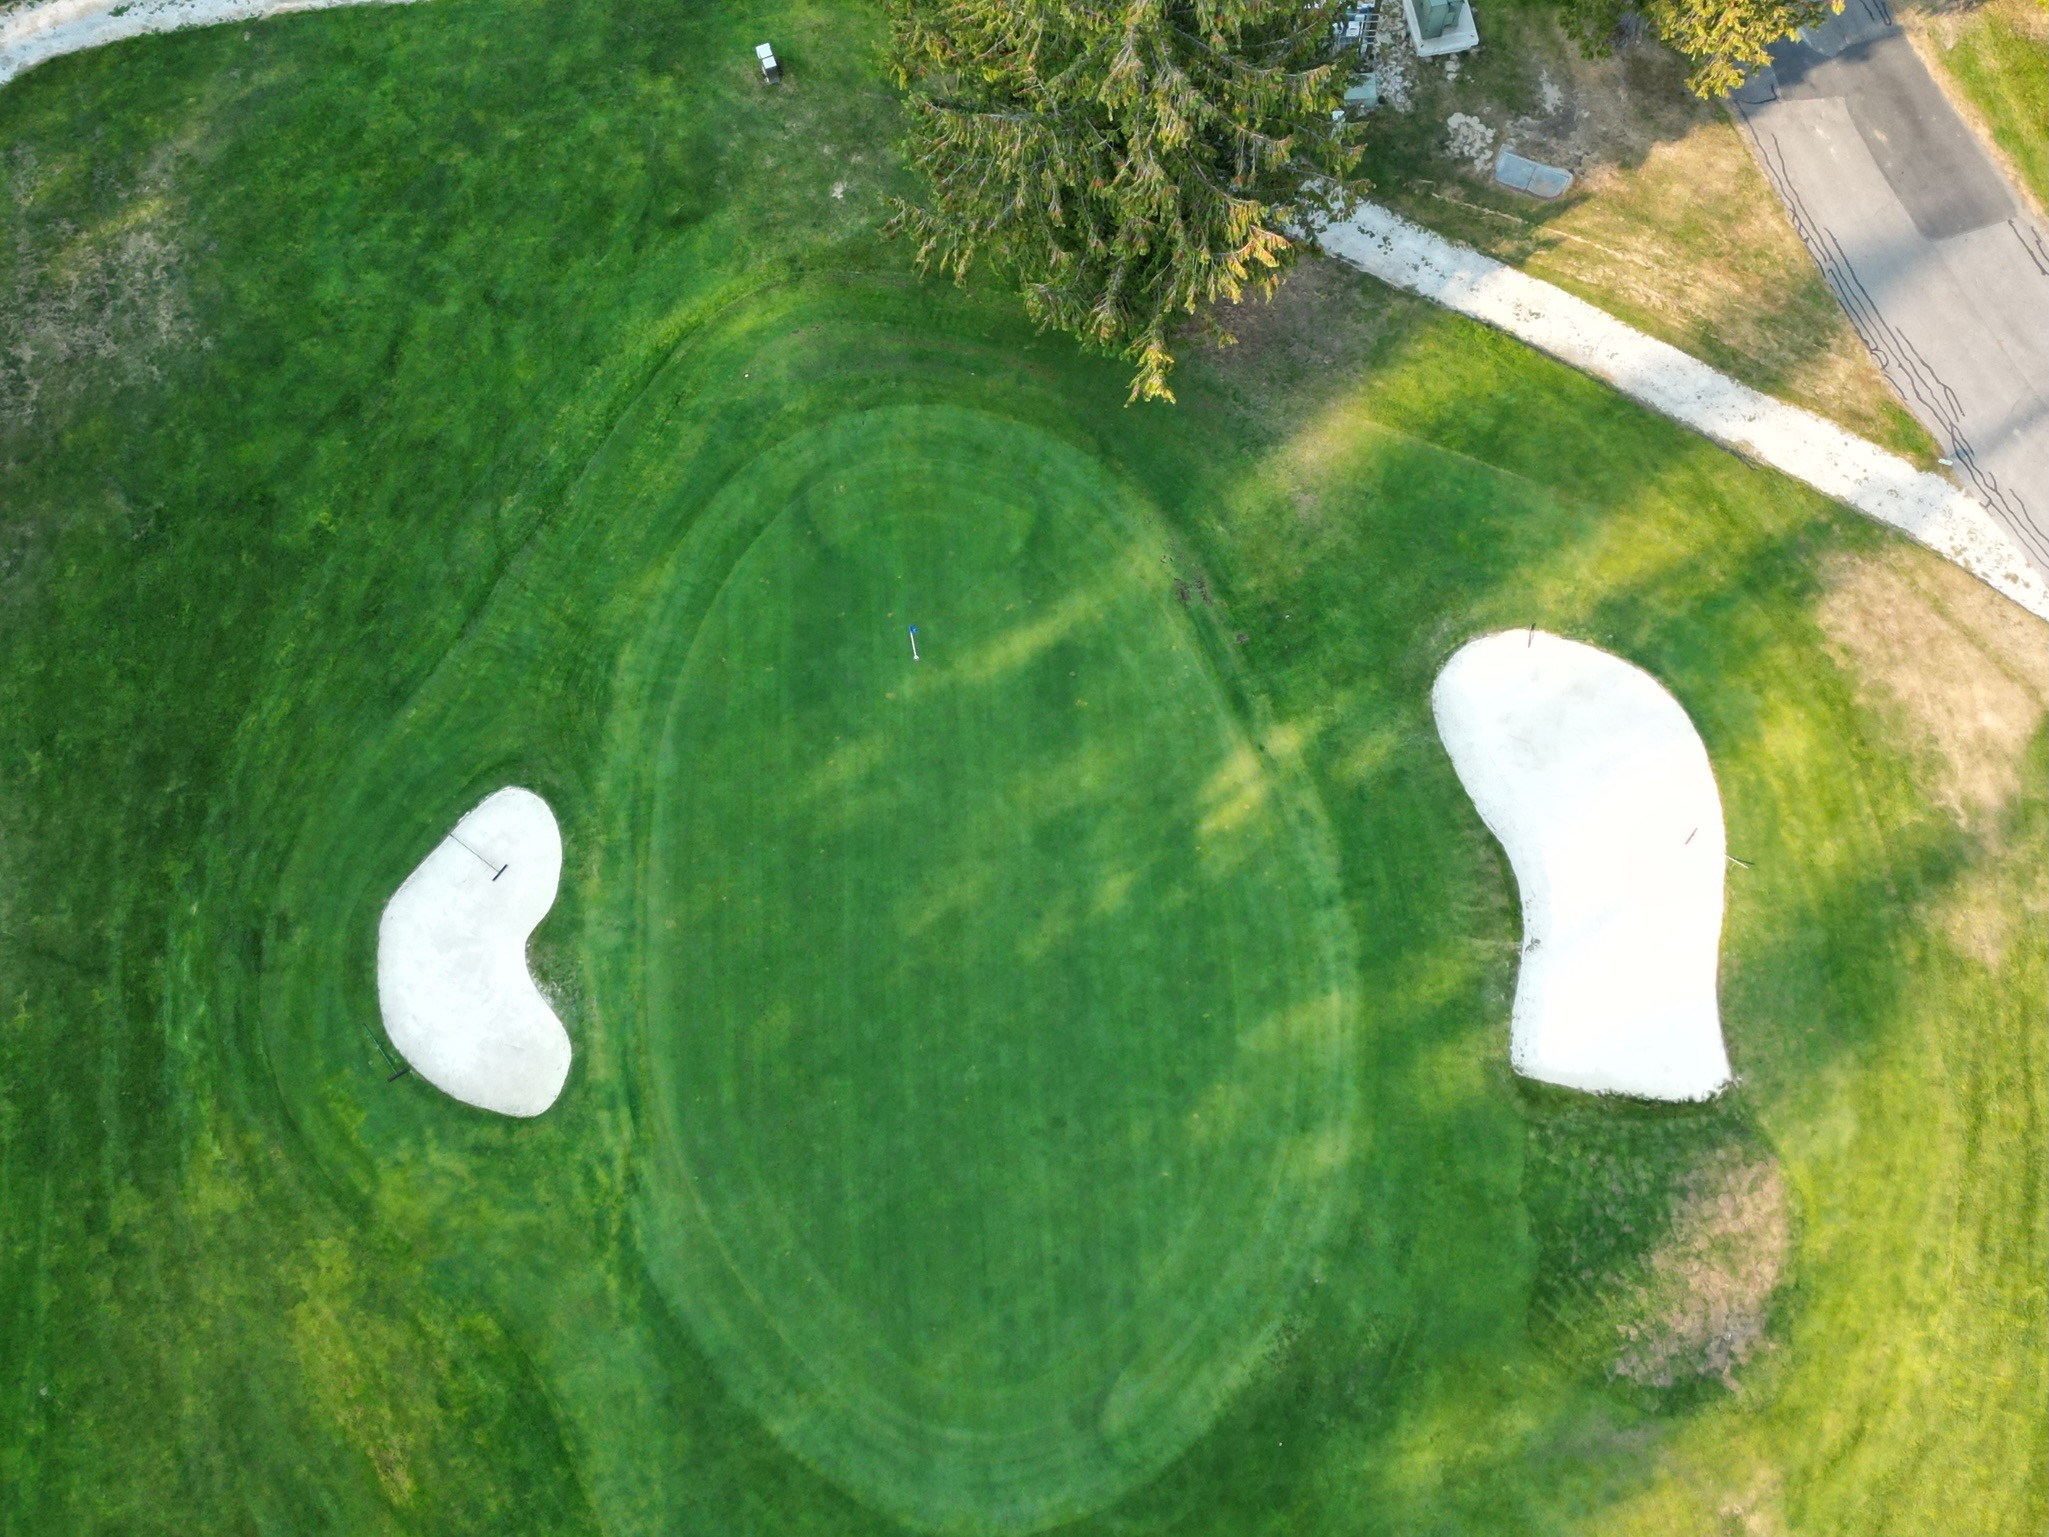
A fantastic hole that requires a pretty accurate tee shot to avoid the trees lining the left side of the fairway bunker & out of bounds to the right. A good sized fairway bunker is on the right also. A good tee shot will land in front of & slightly left of this bunker. Be careful of your approach shot to the reachable green, as there is a water hazard on the front left & two more bunkers guarding the green.
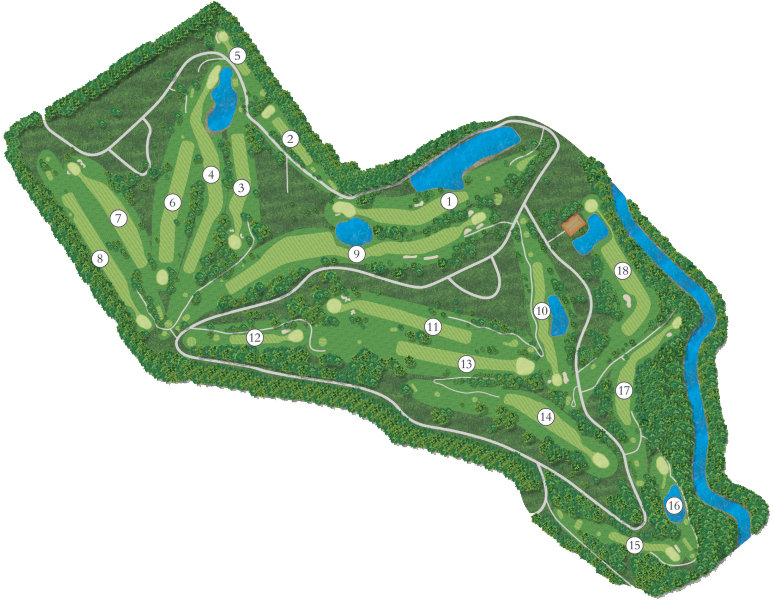
- View Interactive Map
- Par: 4
- 372 yds
- 361 yds
- 285 yds
- 285 yds
- Hcp: 7 / 9
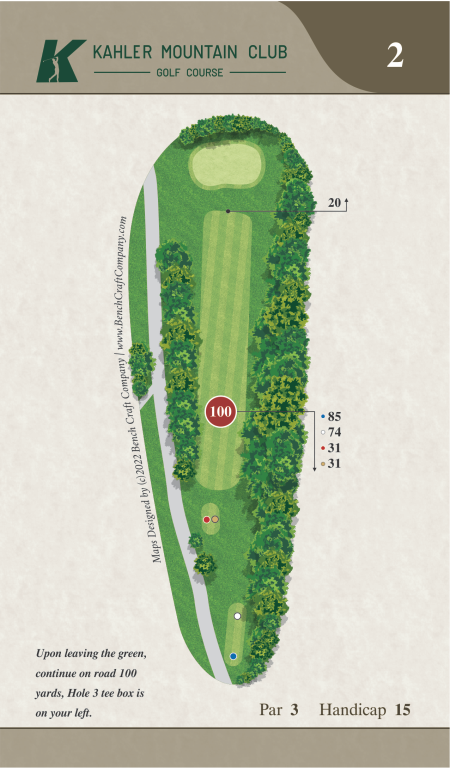
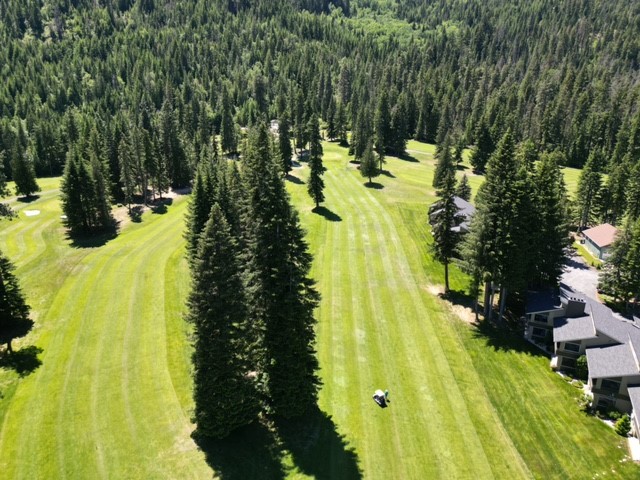
Hole 2
-
This hole is guarded by trees & out of bounds to the right. An elevated green awaits. You will need to land your tee shot on the shallow, but very wide green. Do not hit too far, or you may find that your next shot will have to be delicately hit back down the hill behind the green.

- View Interactive Map
- Par: 3
- 185 yds
- 174 yds
- 131 yds
- 131 yds
- Hcp: 15
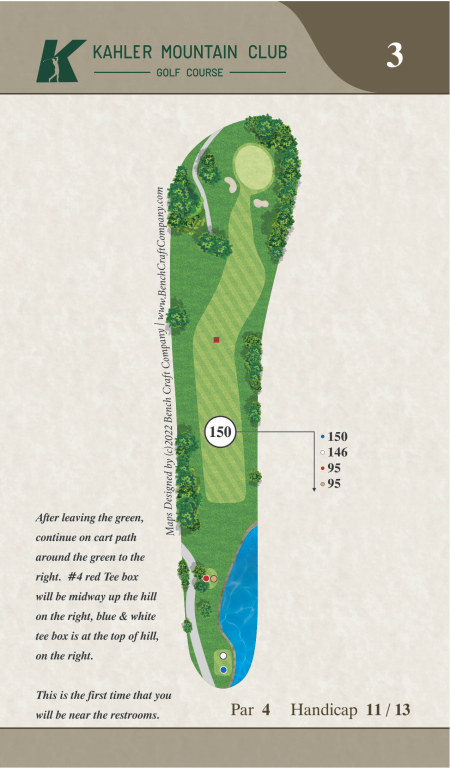
Hole 3
-
You can bring out the driver here. Out of bounds & condos line the left side of this hole with trees on the right. The green is reachable in two shots, but requires good distance & accuracy, as there are deep bunkers guarding the front & left hand side of the green. Be careful putting downhill, or you may be re- visiting one of the bunkers.
- View Interactive Map
- Par: 4
- 300 yds
- 296 yds
- 245 yds
- 245 yds
- Hcp: 11 / 13
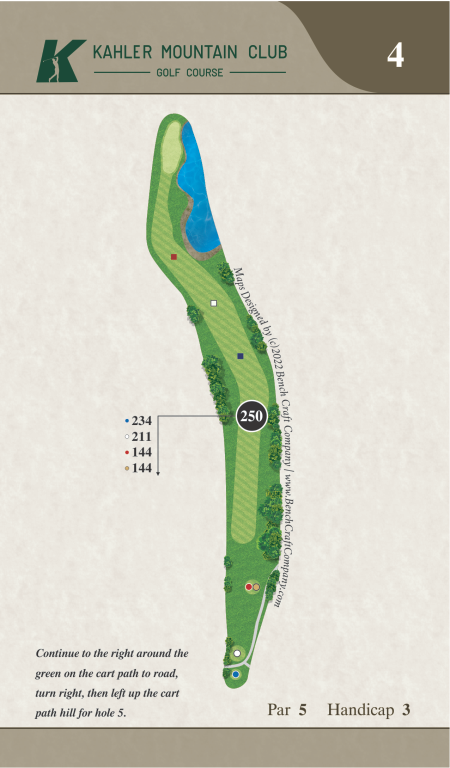
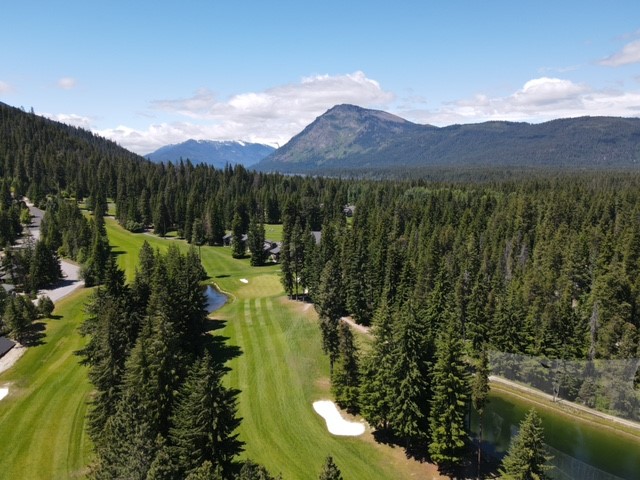
Hole 4
-
A double dogleg hole that will require careful planning. Your first shot should be in the middle or slightly right of the fairway. Your second shot will require distance control and accuracy to set yourself up to the perfect approach to the green. Water comes into play, don’t let it psych you out!
- View Interactive Map
- Par: 5
- 484 yds
- 461 yds
- 394 yds
- 394 yds
- Hcp: 3
Hole 5
-
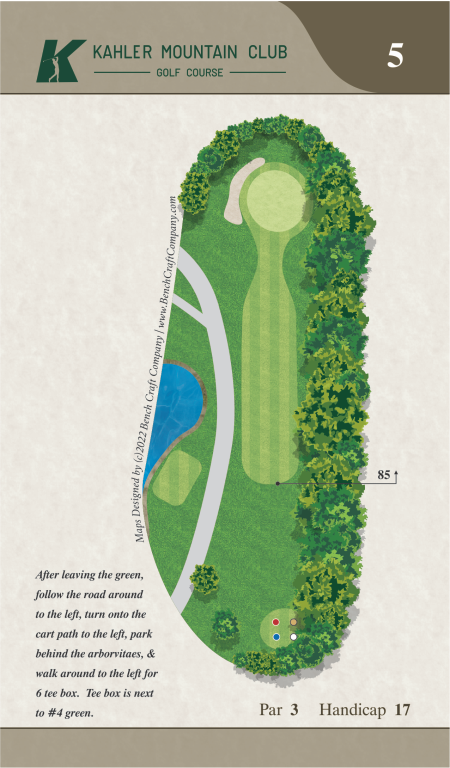
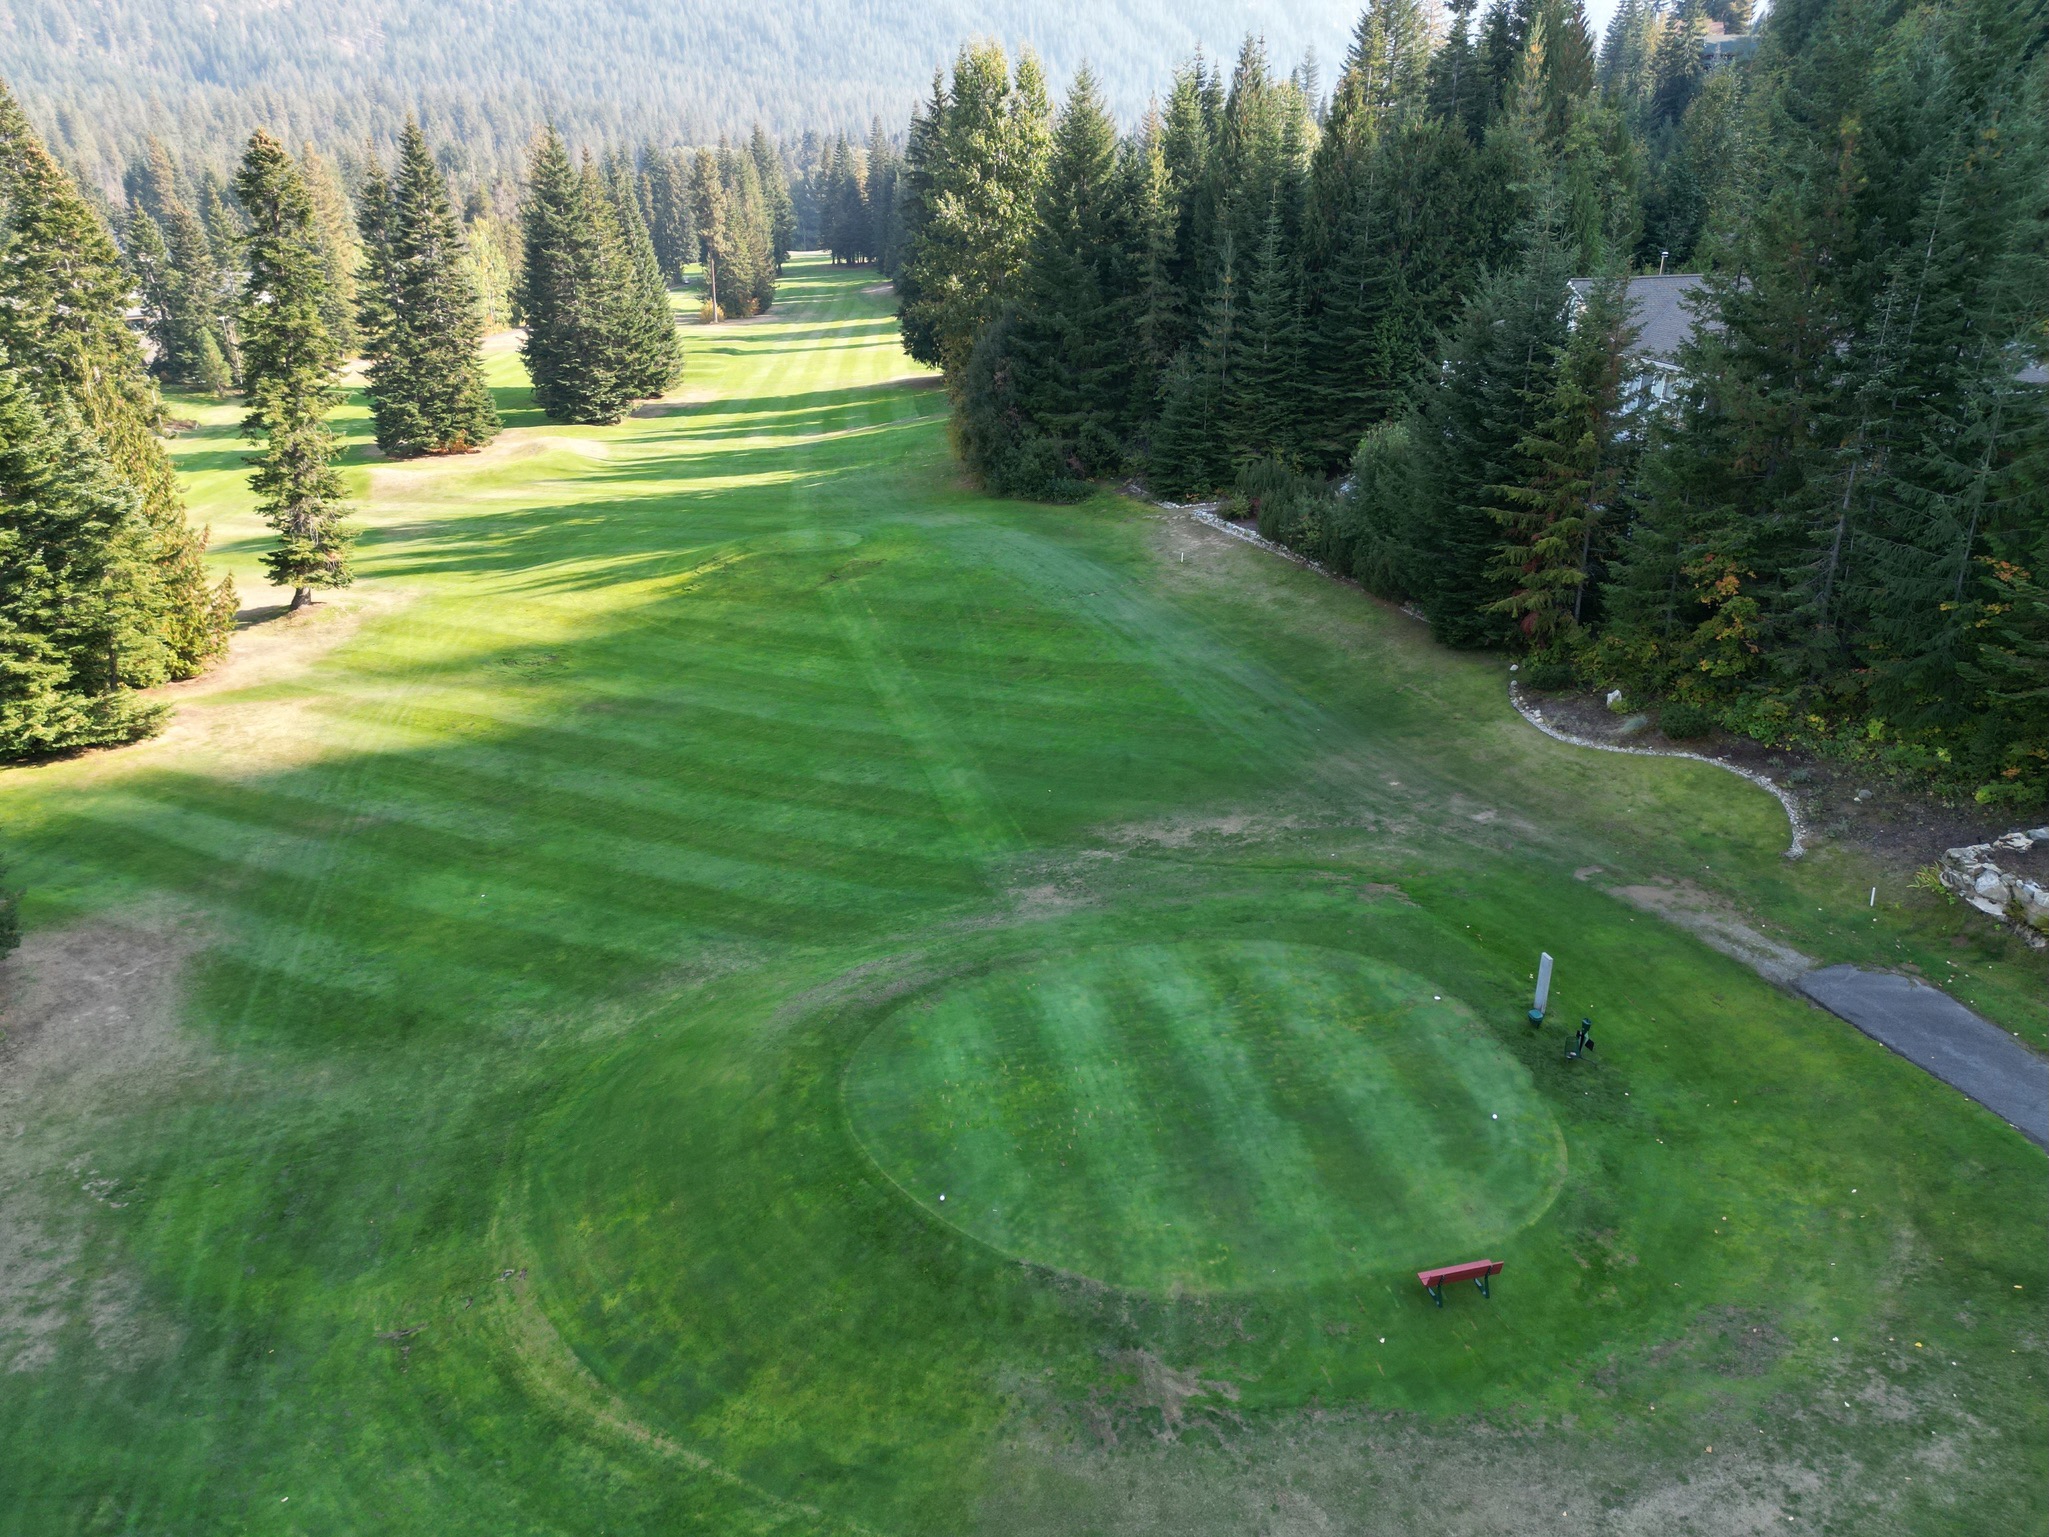
An elevated tee box plays mostly downhill. Proper club selection is critical to staying on the green. Be sure to avoid going over the green, which is a steep, but playable hill. Out of bounds to the right & a road to the left of the fairway. A bunker at the back left will be your friend if you over hit from the tee box.

- View Interactive Map
- Par: 3
- 129 yds
- 129 yds
- 124 yds
- 124 yds
- Hcp: 3
Hole 6
-
Condos line the right side of the fairway with out of bounds. This hole plays uphill, with a small elevated green. The green has a small slope, so keep your wits about you while putting.

- View Interactive Map
- Par: 4
- 348 yds
- 338 yds
- 255 yds
- 255 yds
- Hcp: 5
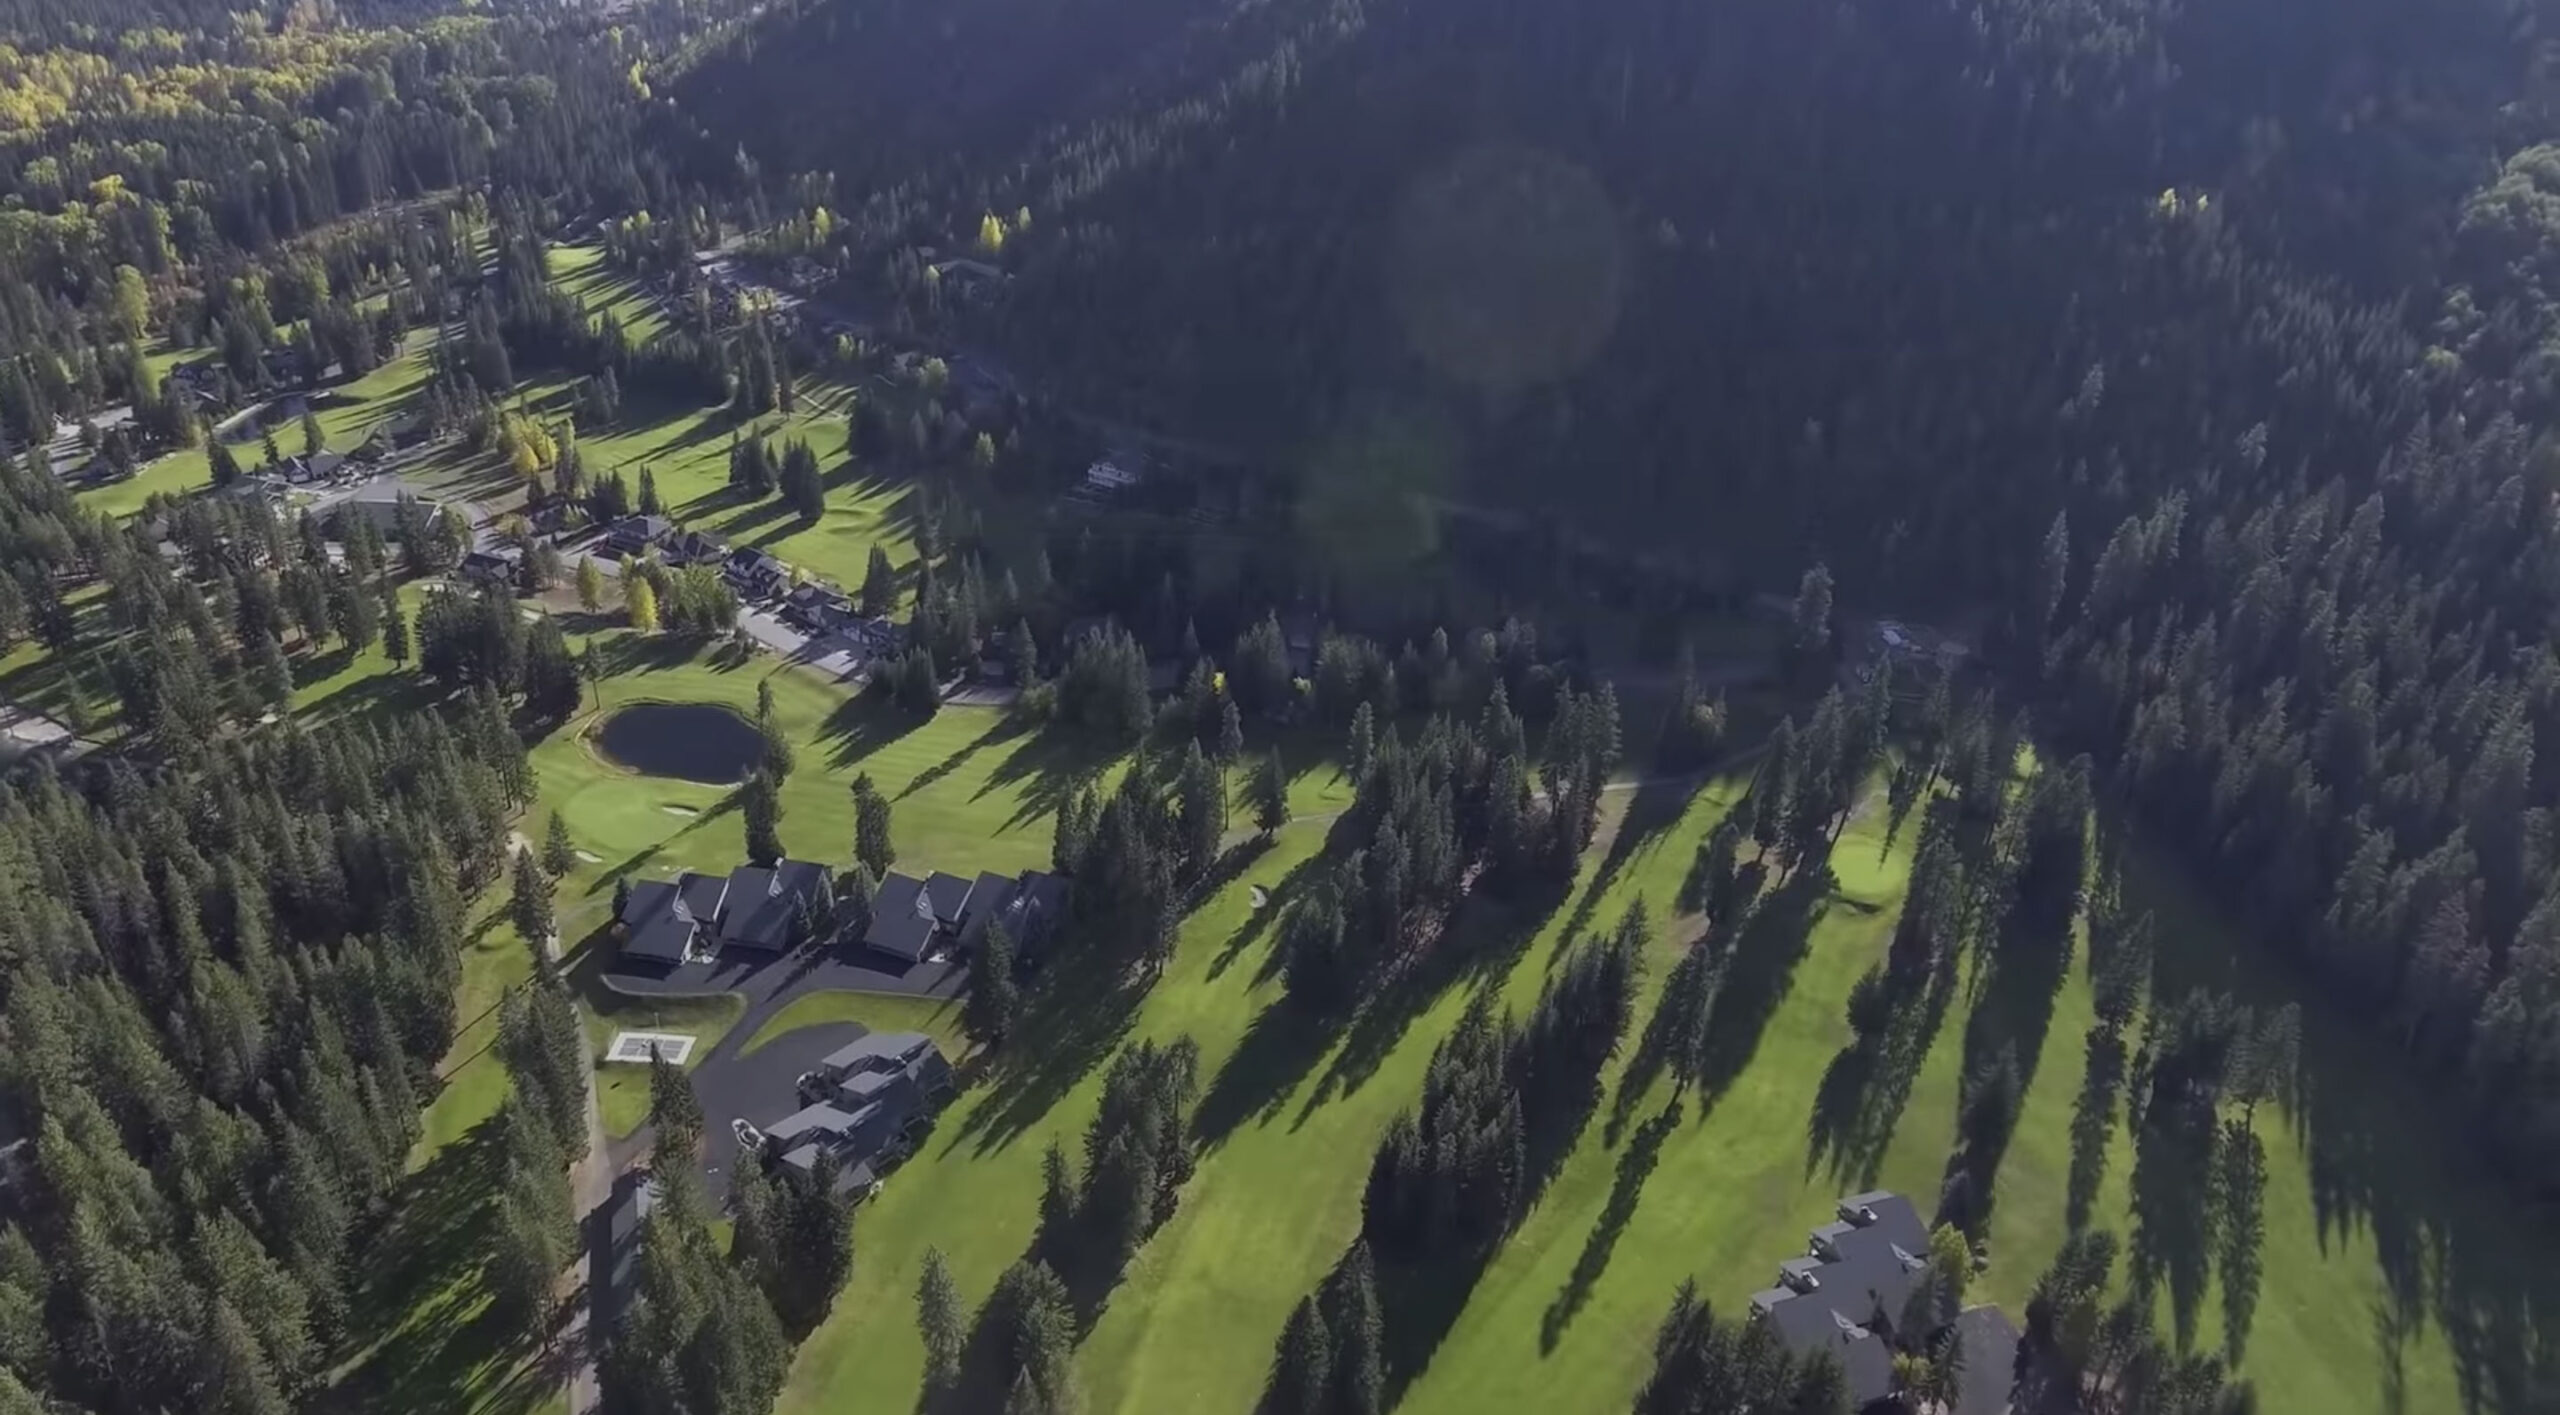
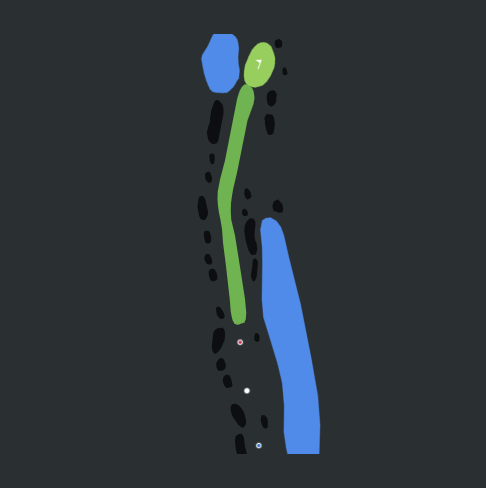
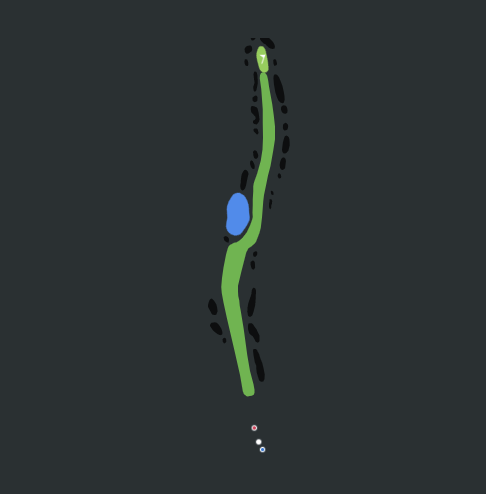
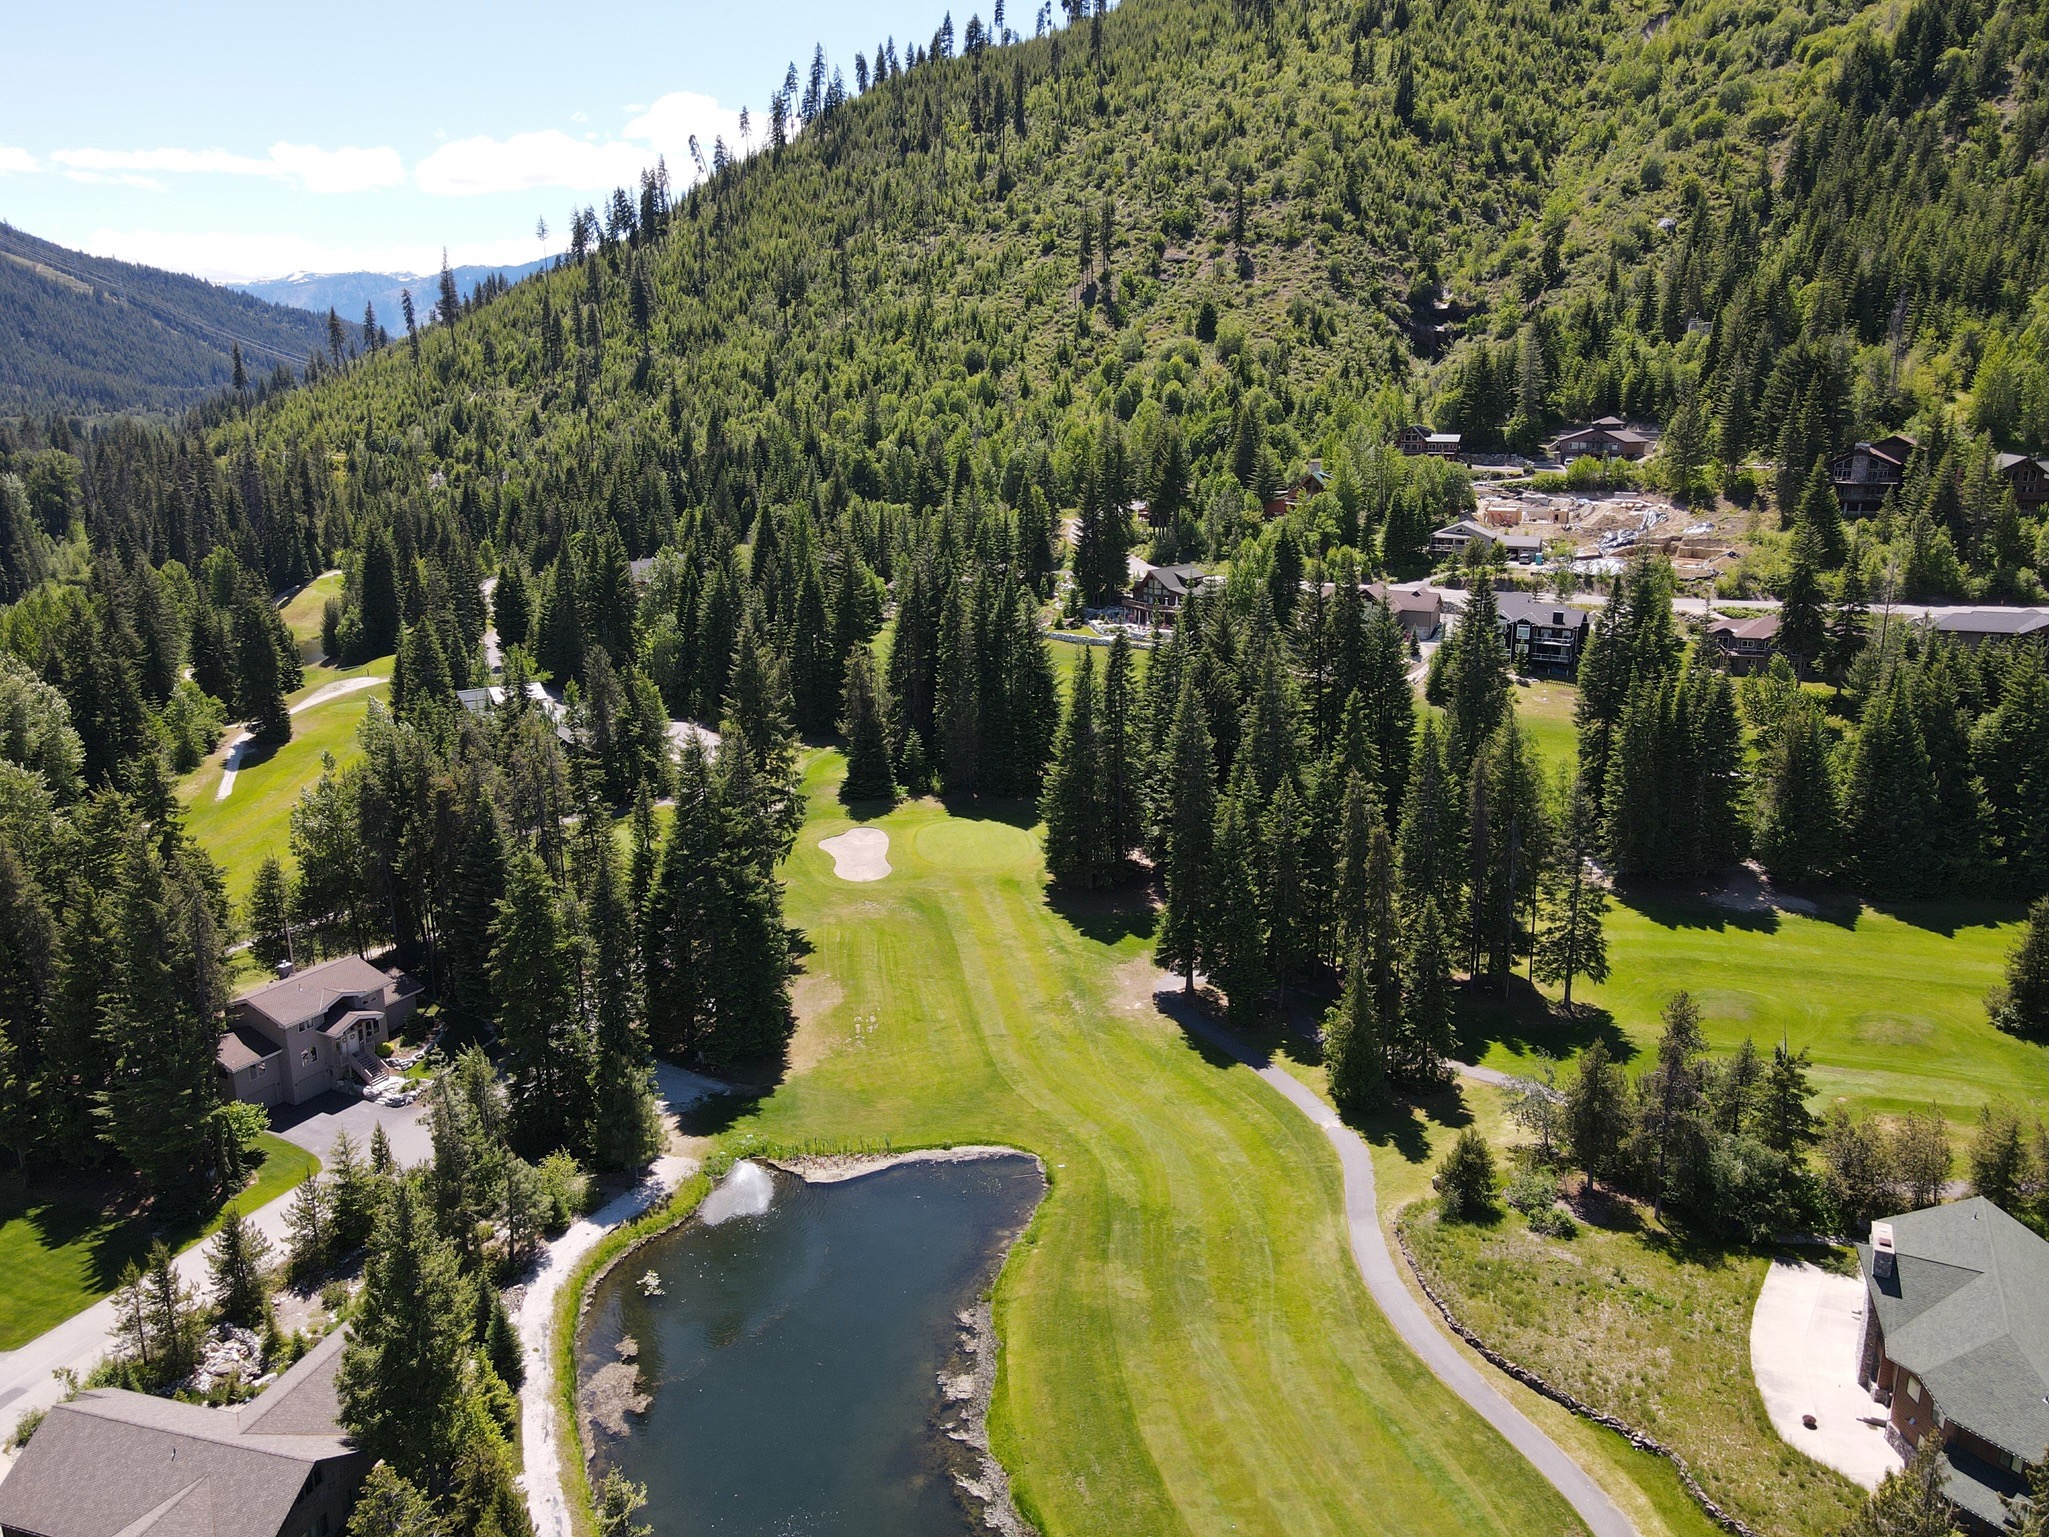
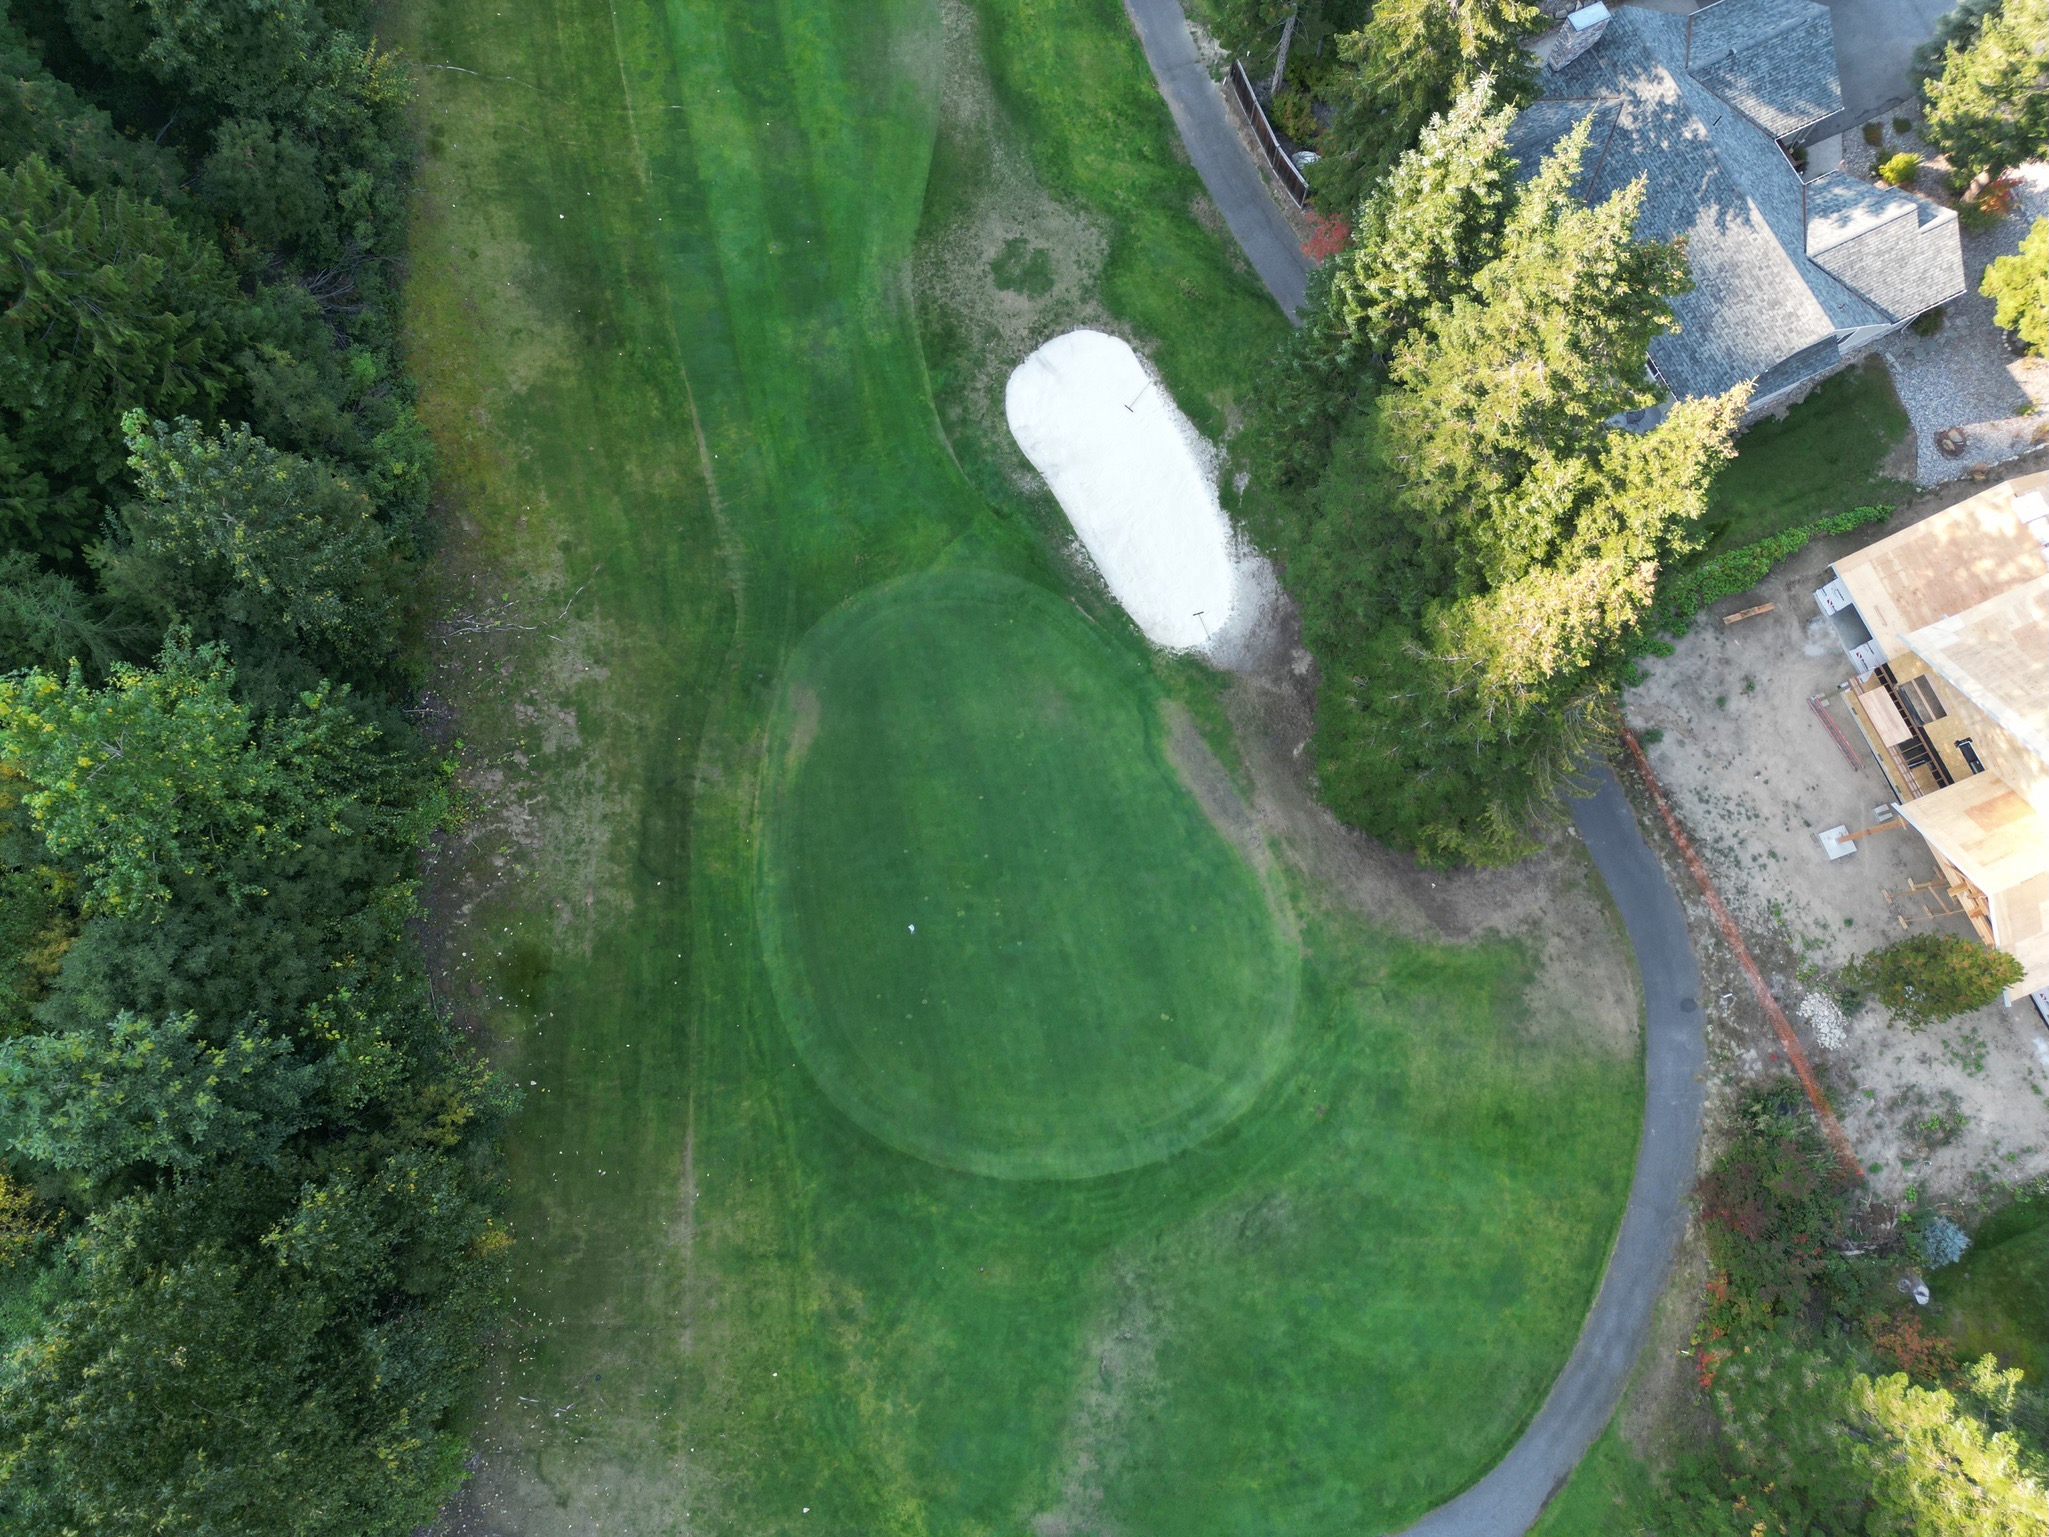
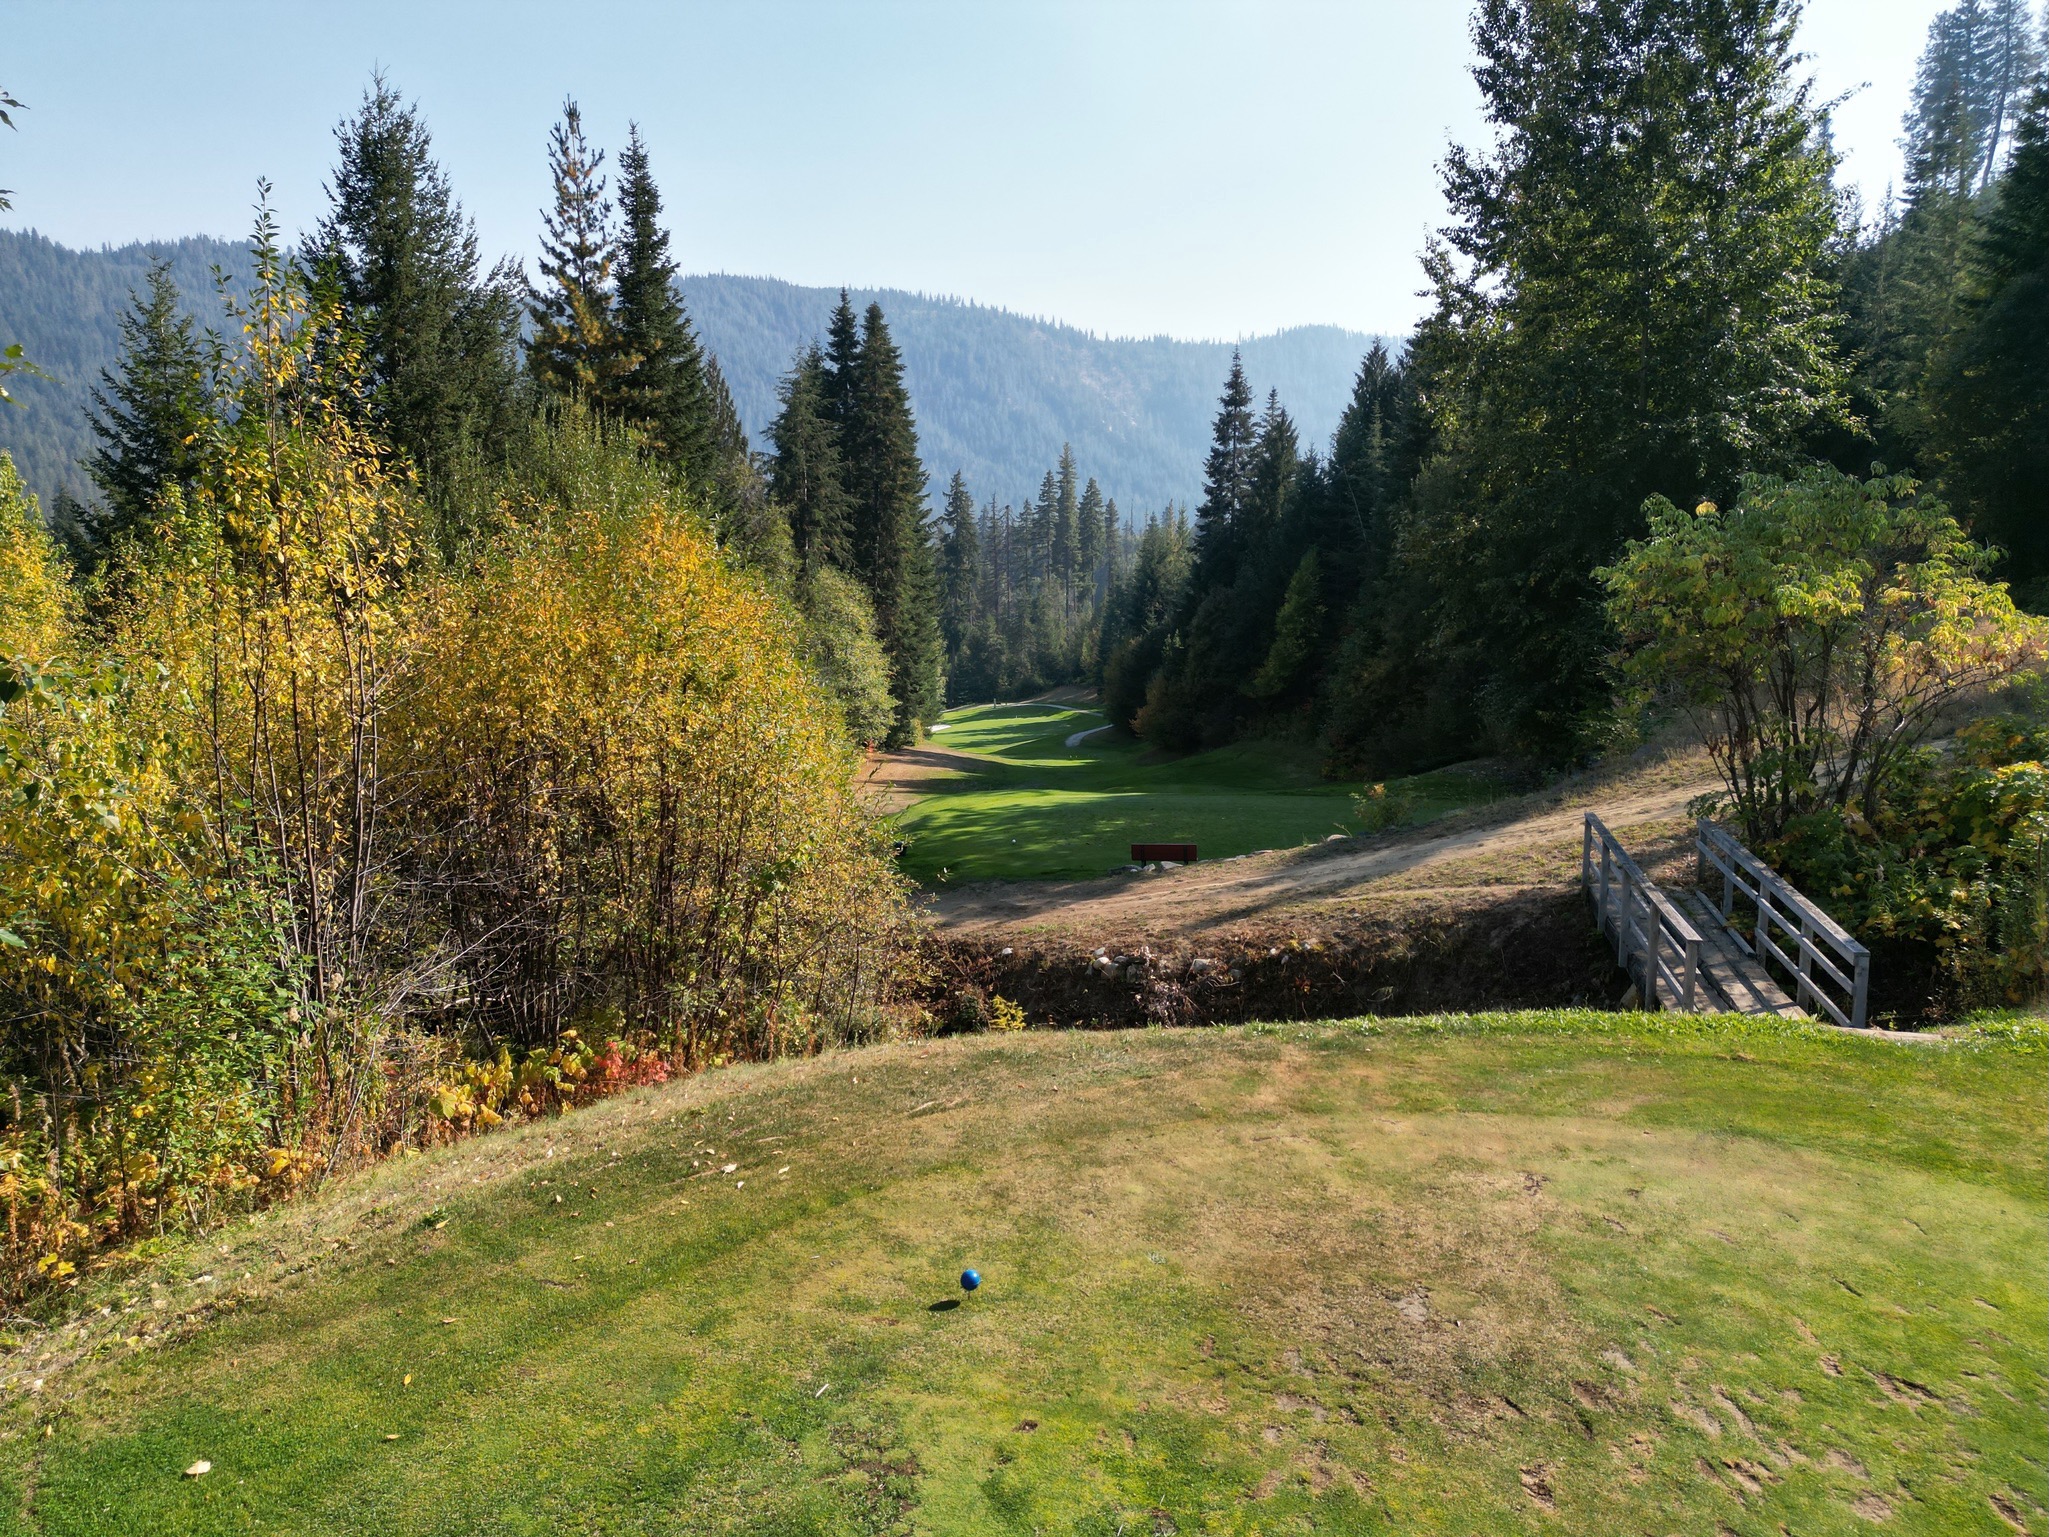
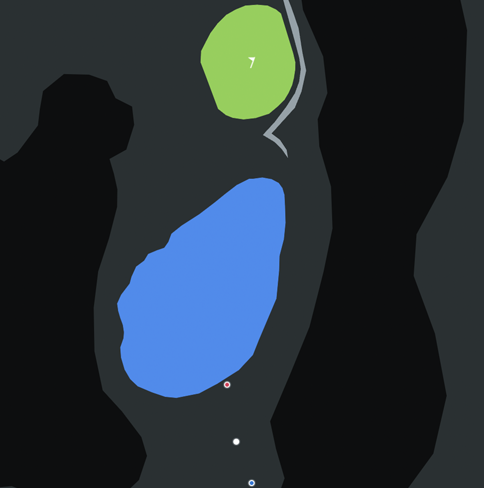
Hole 7
-
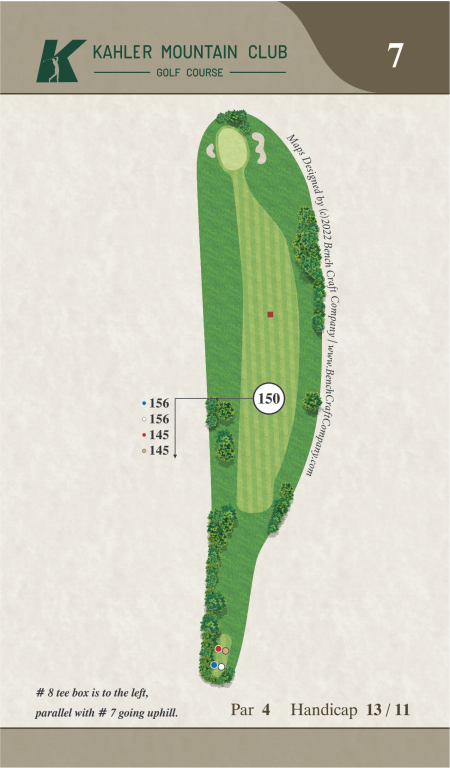
It is all downhill from here, so proper club selection is critical. Wide fairway lined with out of bounds to the right. There are deep bunkers protecting the green.

- View Interactive Map
- Par: 4
- 306 yds
- 306 yds
- 295 yds
- 295 yds
- Hcp: 13 / 11
Hole 8
-
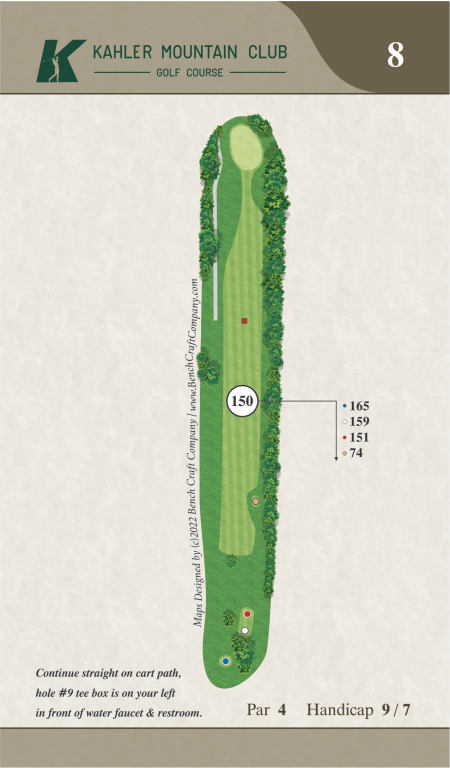
It is all uphill with out of bounds all of the way up on the right. Know when to put your driver away, if you have a tendency to slice. An elevated green requires a precise approach to avoid going down the steep bank on the left.

- View Interactive Map
- Par: 4
- 315 yds
- 309 yds
- 301 yds
- 224 yds
- Hcp: 9 / 7
Hole 9
-
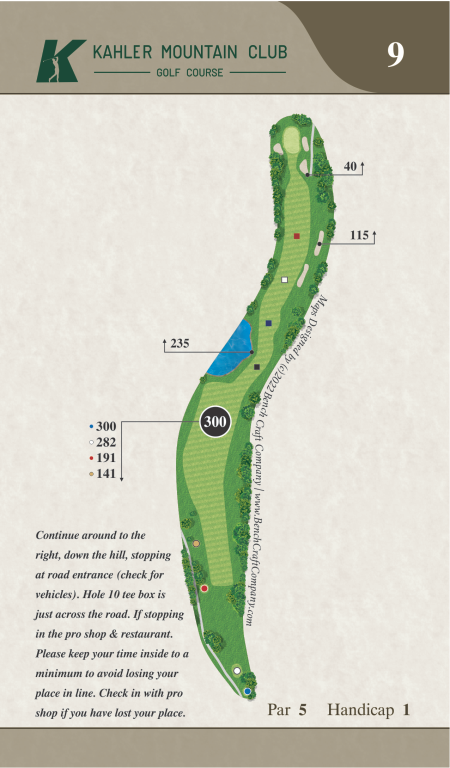
A double dogleg will challenge your ability. Your first shot should land down the middle in front of the water hazard. Out of bounds line the right side of the fairway. This fairway continues to the right of the water hazard. Be careful not to hit your second ball into the two bunkers on the right. You will see the green from this point.
- View Interactive Map
- Par: 5
- 600 yds
- 582 yds
- 491 yds
- 441 yds
- Hcp: 1
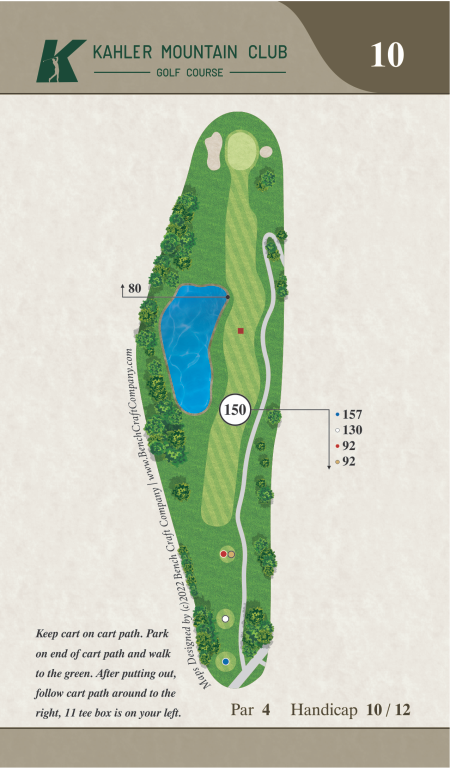
Hole 10
-
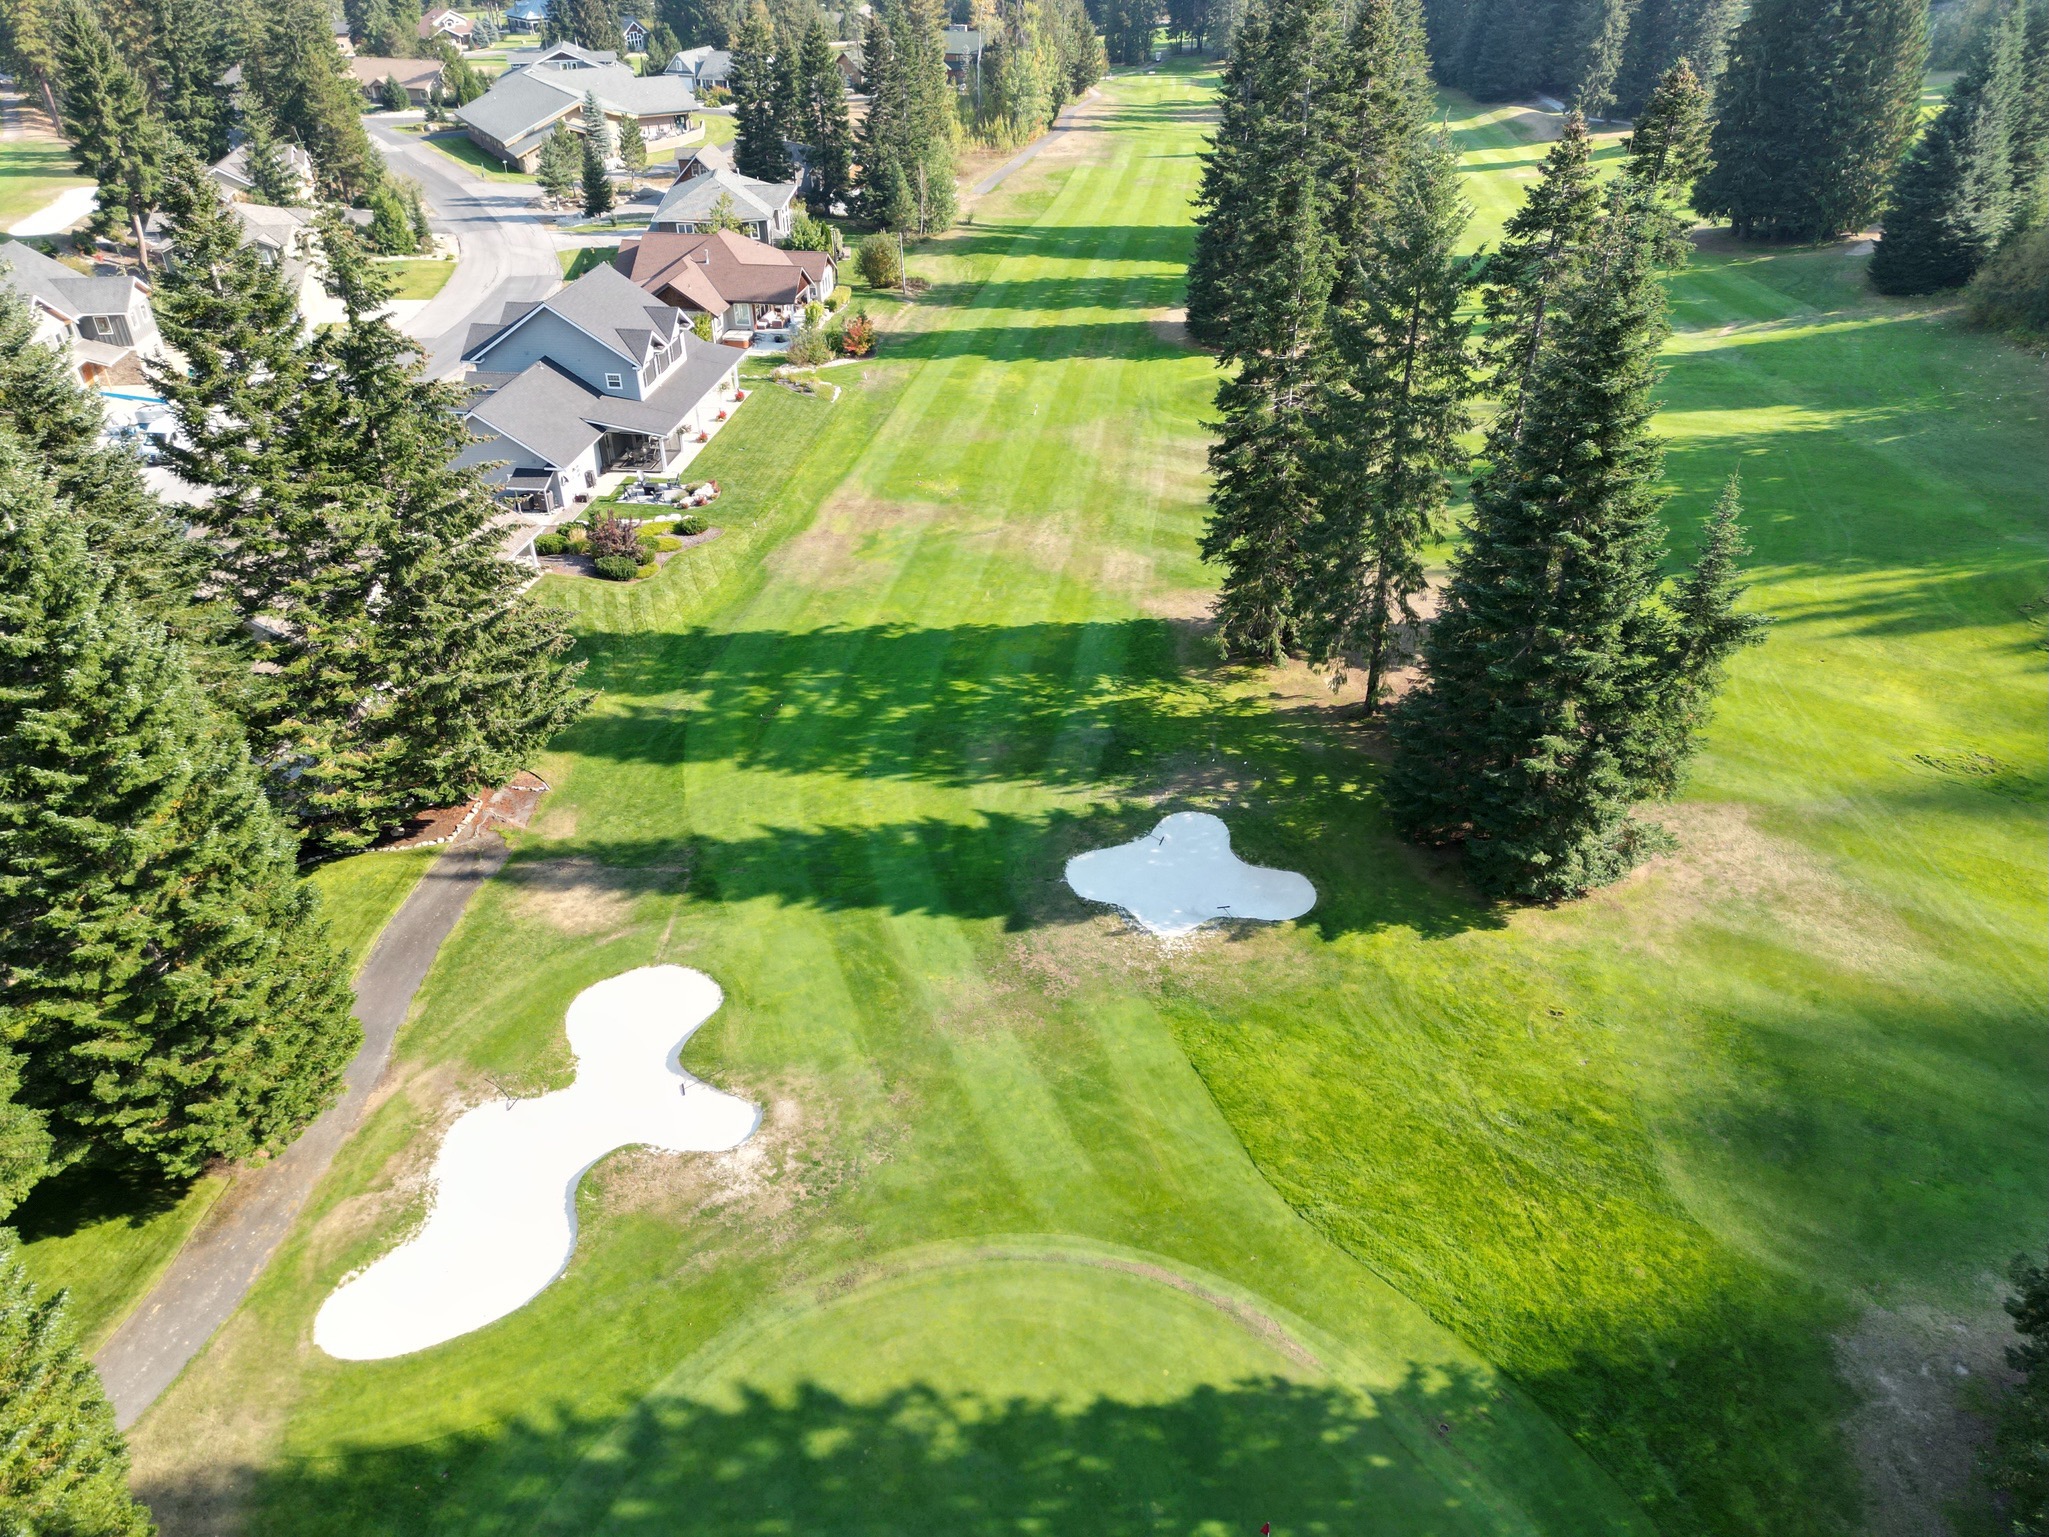
Out of bounds lines the right side of the fairway & there’s a water hazard on the left. A straight hit off of the tees will set up the perfect approach to the reachable green. Only the longest hitters will be getting to the green in one. Deep bunkers protect the left & right side of the green.

- View Interactive Map
- Par: 4
- 307 yds
- 280 yds
- 242 yds
- 242 yds
- Hcp: 10 / 12
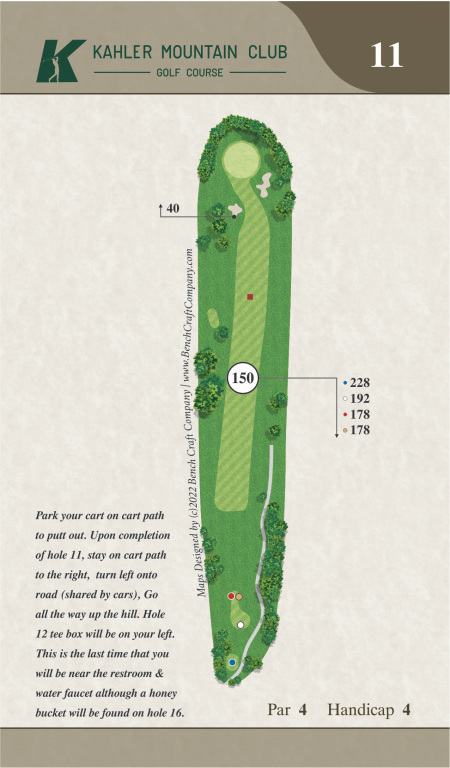
Hole 11
-
Out of bounds protects the right side of this long fairway. The perfect shot is right down the middle above the incline. The green is protected by bunkers in front. This is a deep green, so pay close attention to the placement of the flag.

- View Interactive Map
- Par: 4
- 378 yds
- 342 yds
- 328 yds
- 328 yds
- Hcp: 4
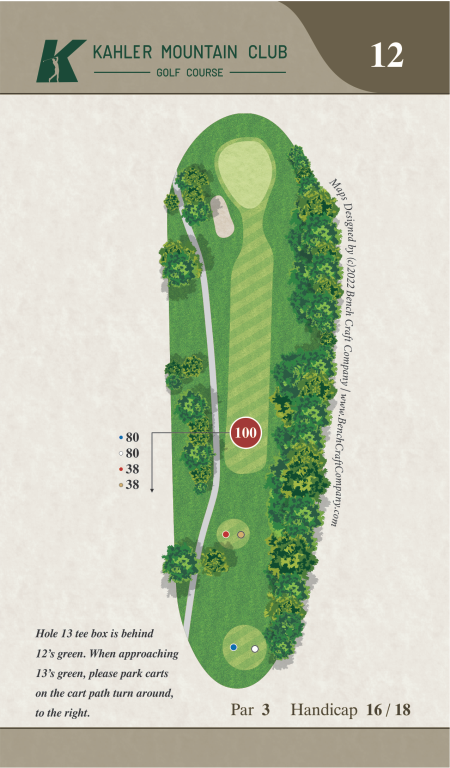
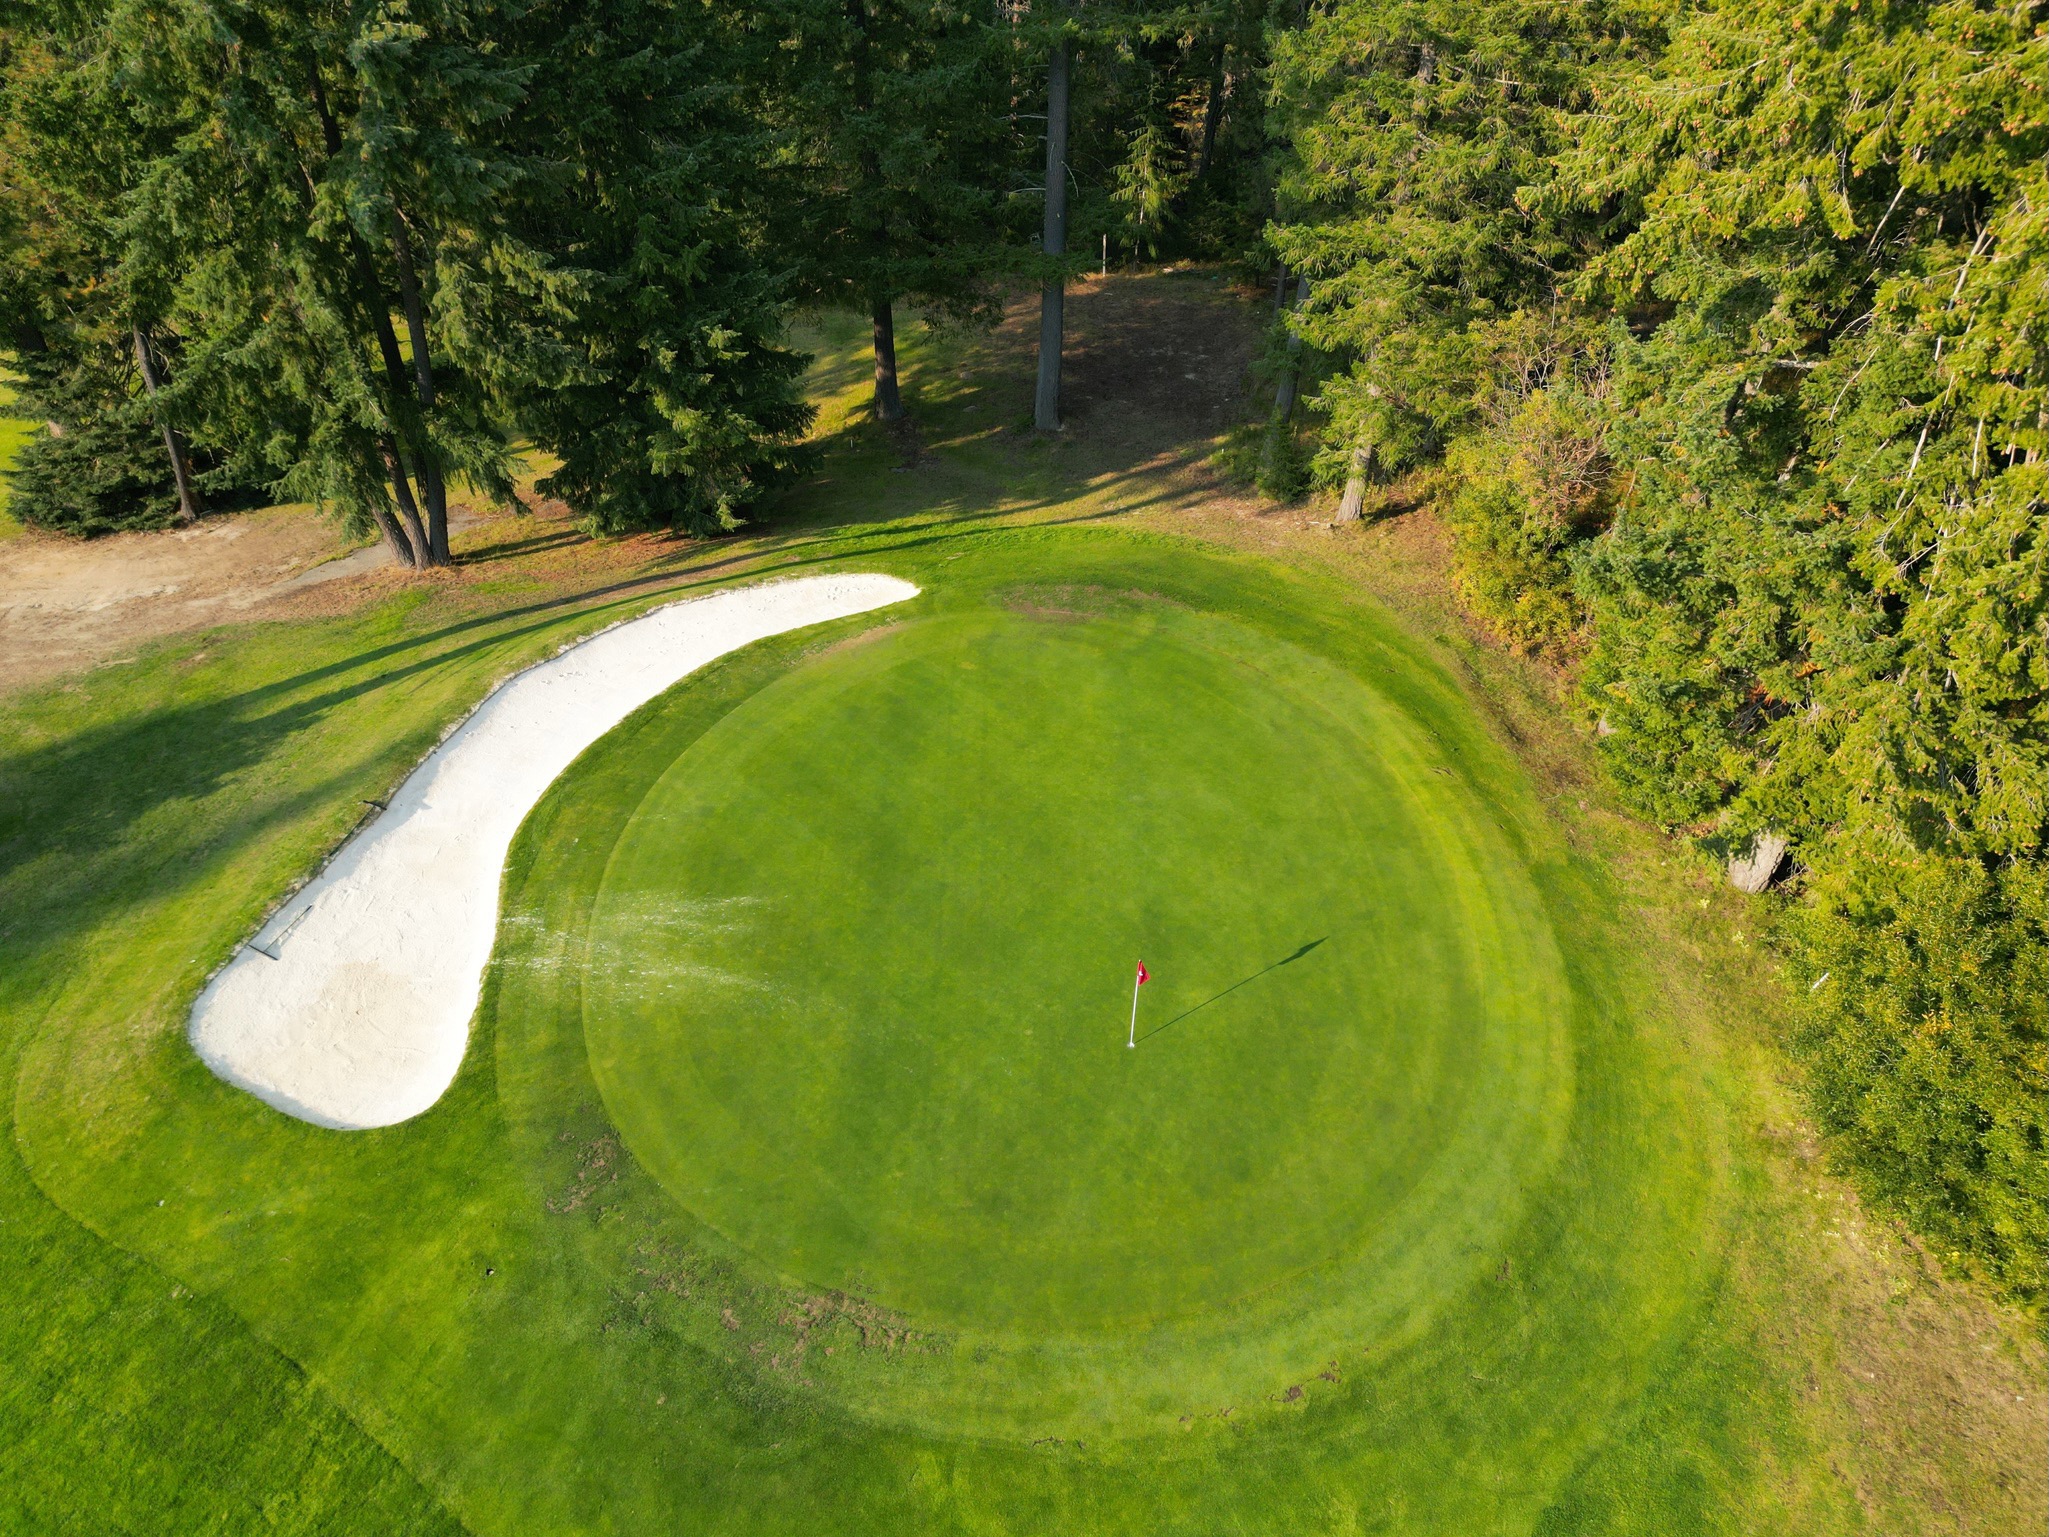
Hole 12
-
A straight hole with a steep hill lining the right side & out of bounds on the left. A reachable green with a deep bunker at the front left of the green. A front left hole placement will cause anyone to have second thoughts about attacking the pin.

- View Interactive Map
- Par: 3
- 180 yds
- 180 yds
- 138 yds
- 138 yds
- Hcp: 16 / 18
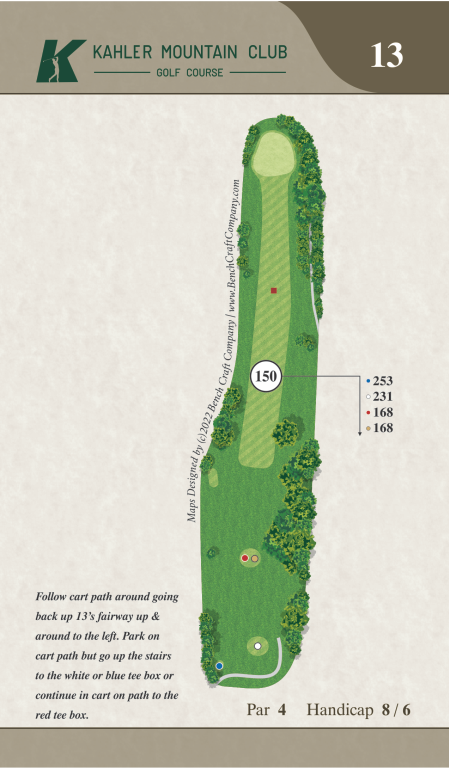
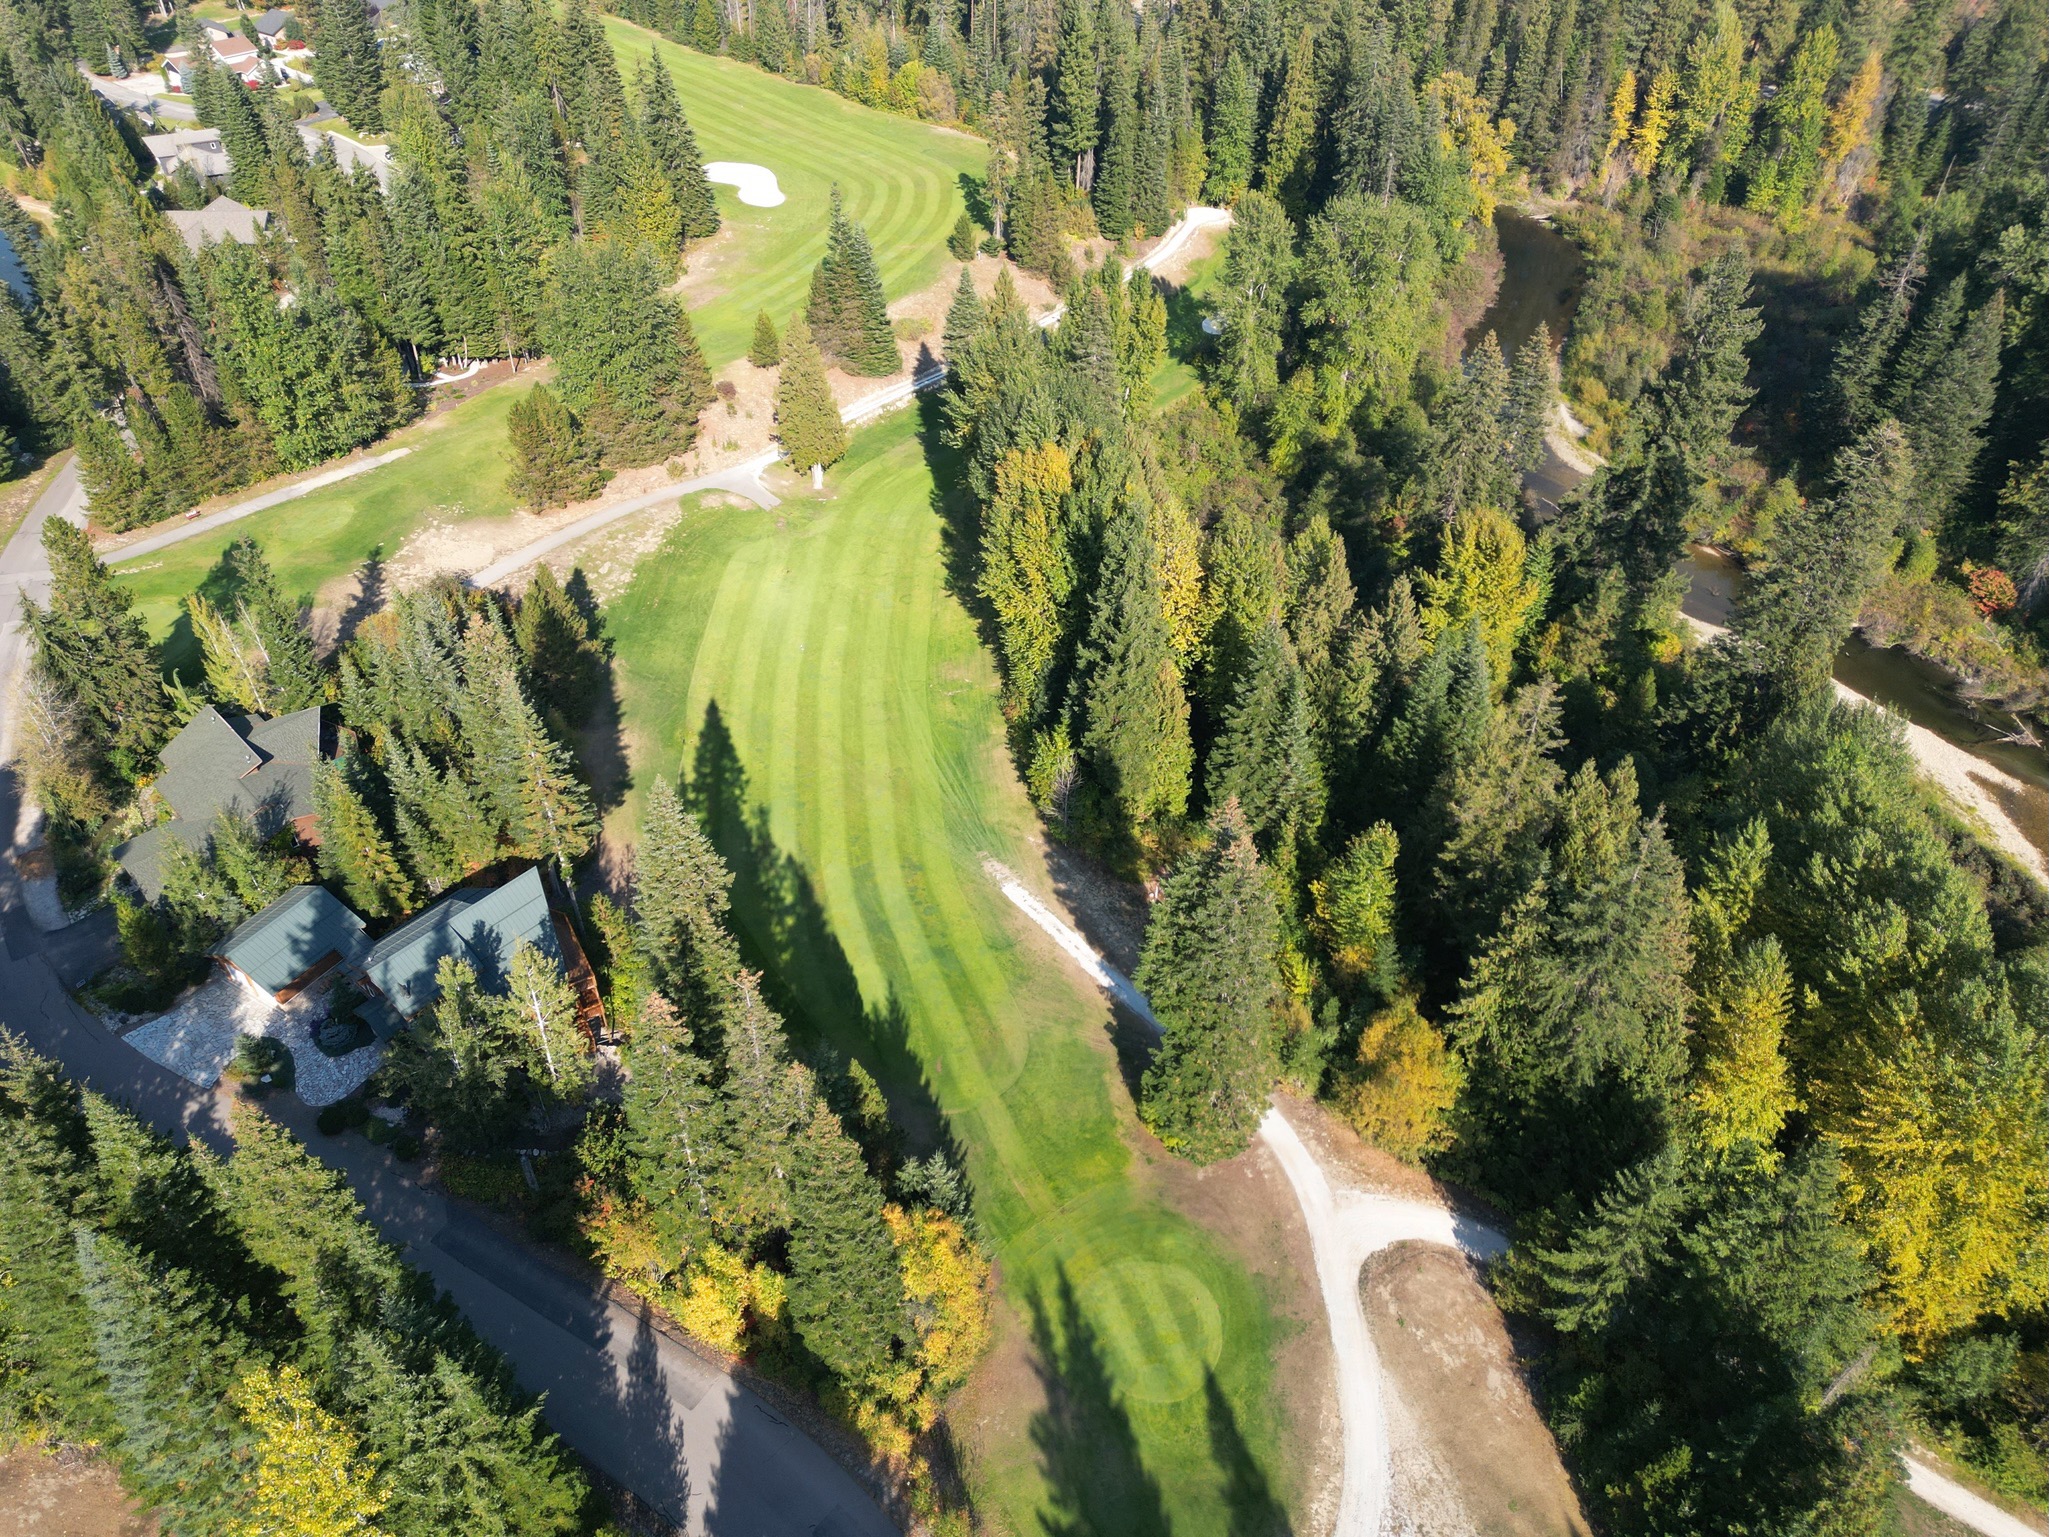
Hole 13
-
This hole goes downhill from the tee box before flattening out. Easily reachable in two shots. Stay out of the trees lining both sides of the fairway to avoid trouble. Green has two levels. If pin placement is front right, very careful club selection should be made to ‘stick’ the shot.

- View Interactive Map
- Par: 4
- 403 yds
- 381 yds
- 318 yds
- 318 yds
- Hcp: 8 / 6
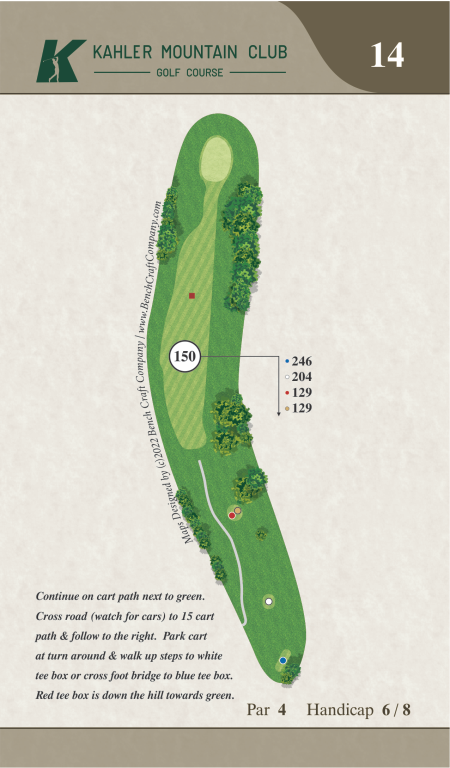
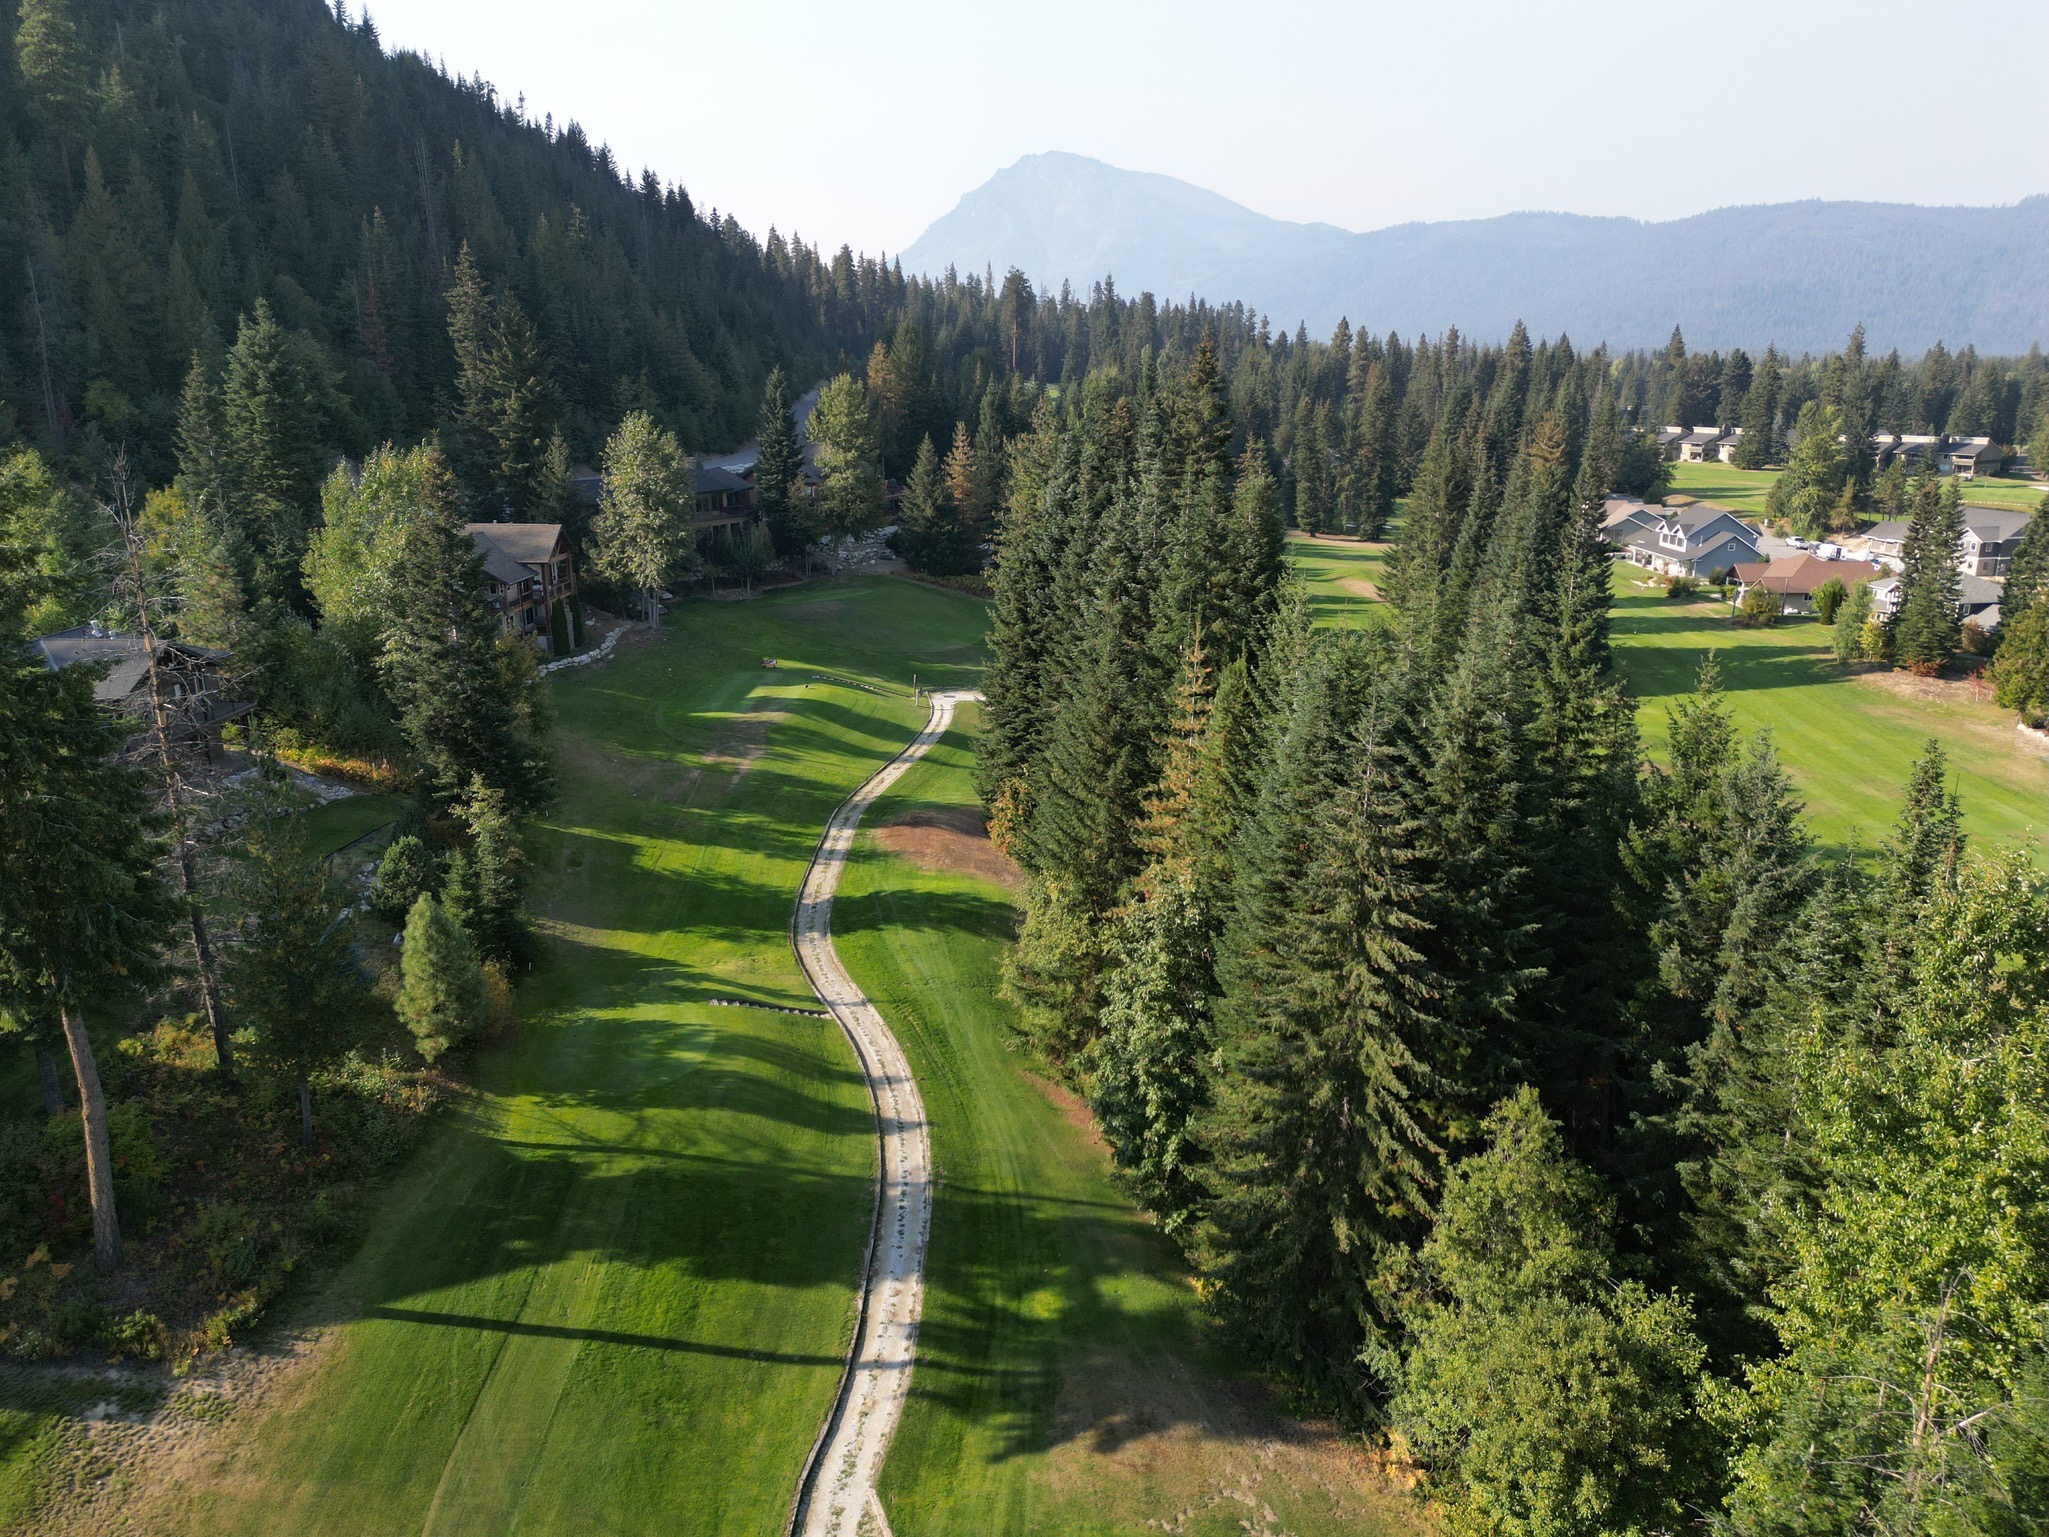
Hole 14
-
This is a dogleg to the right but the slope goes to the left. Out of bounds lines the right side of the fairway. Just hit it down the middle for the perfect set up for your second shot. Do not try to cut the corner to avoid hitting houses. Pay notice to the gentle slope of the green.

- View Interactive Map
- Par: 4
- 396 yds
- 354 yds
- 279 yds
- 279 yds
- Hcp: 6 / 8
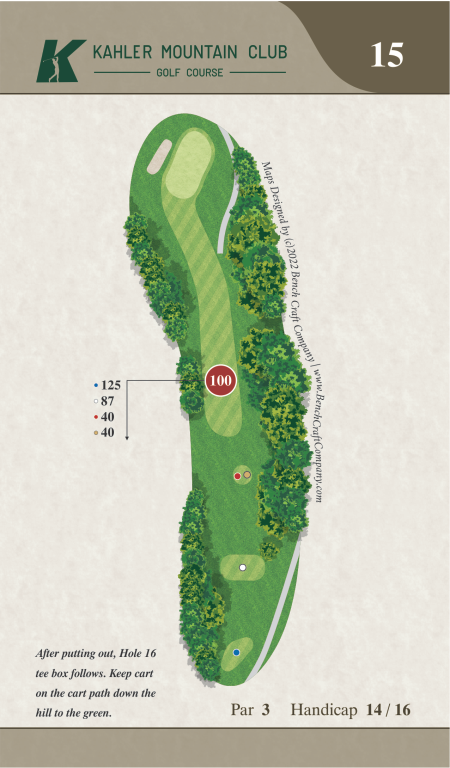
Hole 15
-
This is a risk reward hole. Your tee shot requires accuracy with, this tight downhill, tree lined fairway. The green is short but wide with a bunker in the back to catch those long shots.

- View Interactive Map
- Par: 3
- 225 yds
- 187 yds
- 140 yds
- 140 yds
- Hcp: 14 / 16
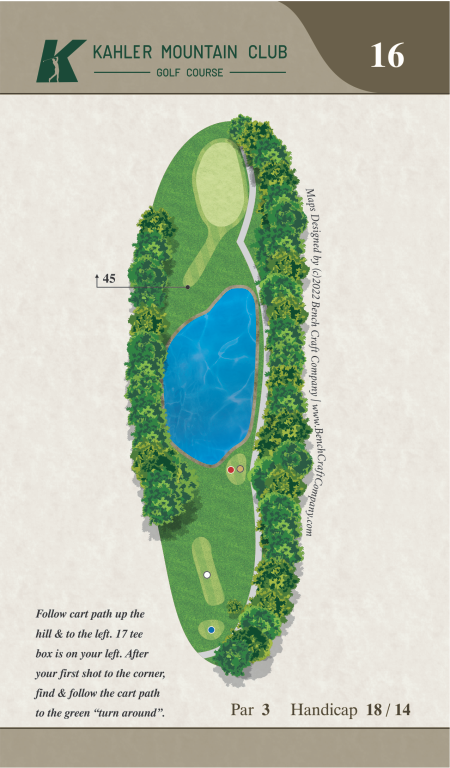
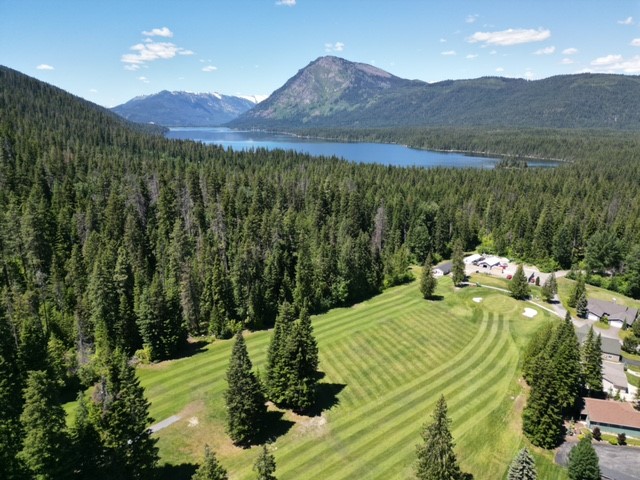
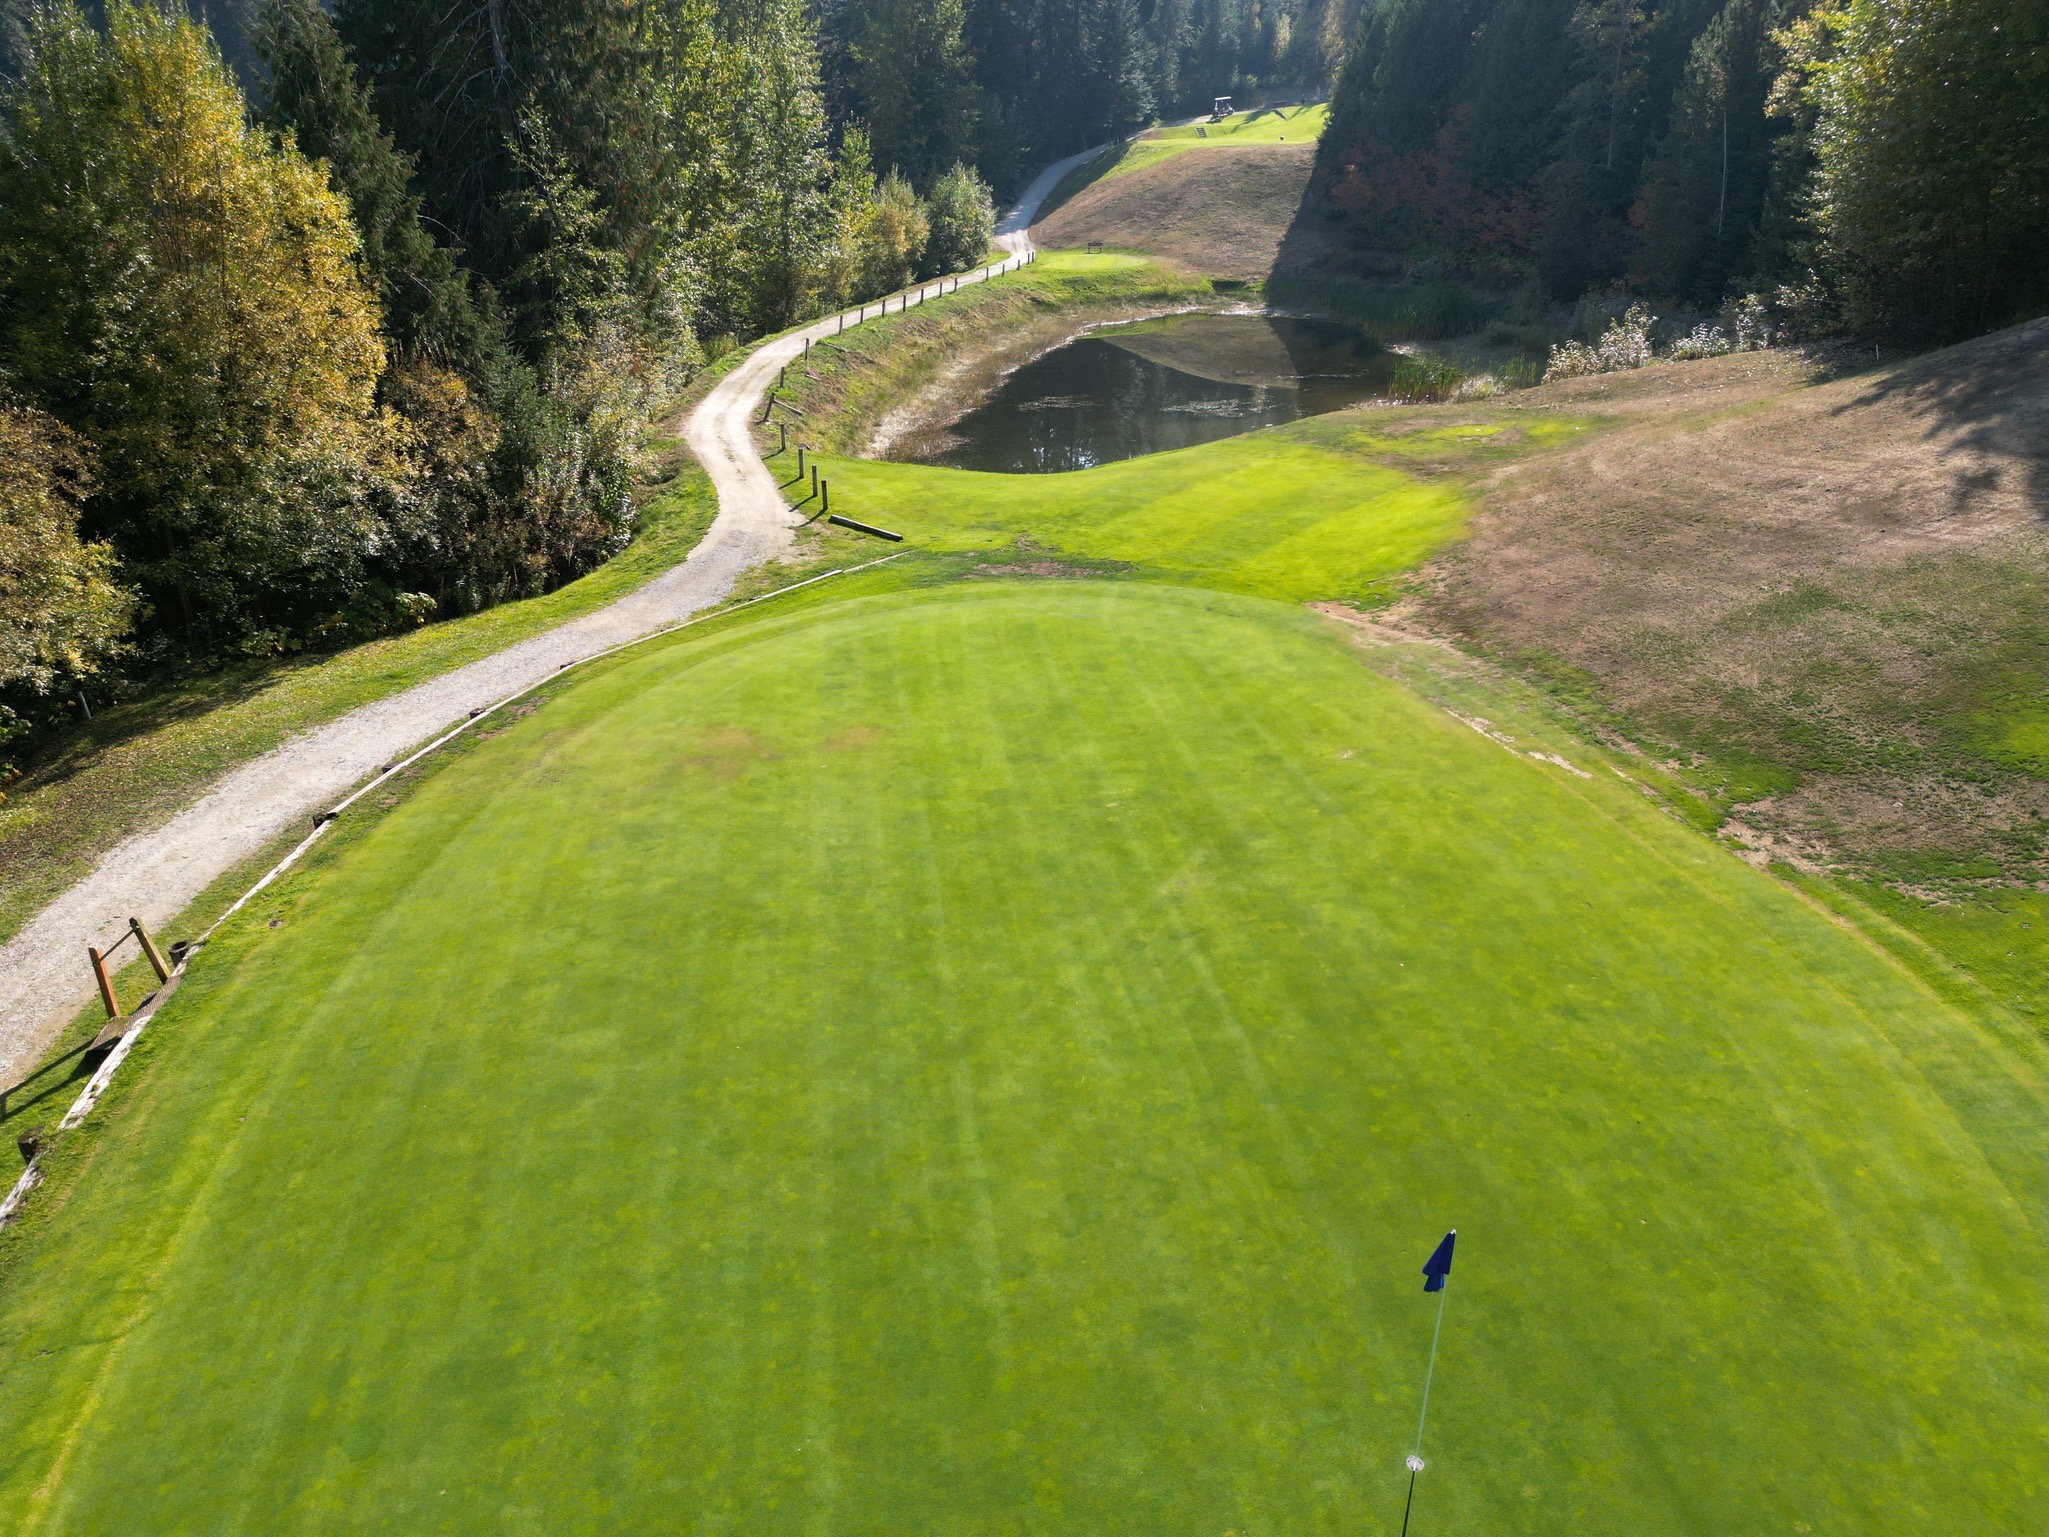
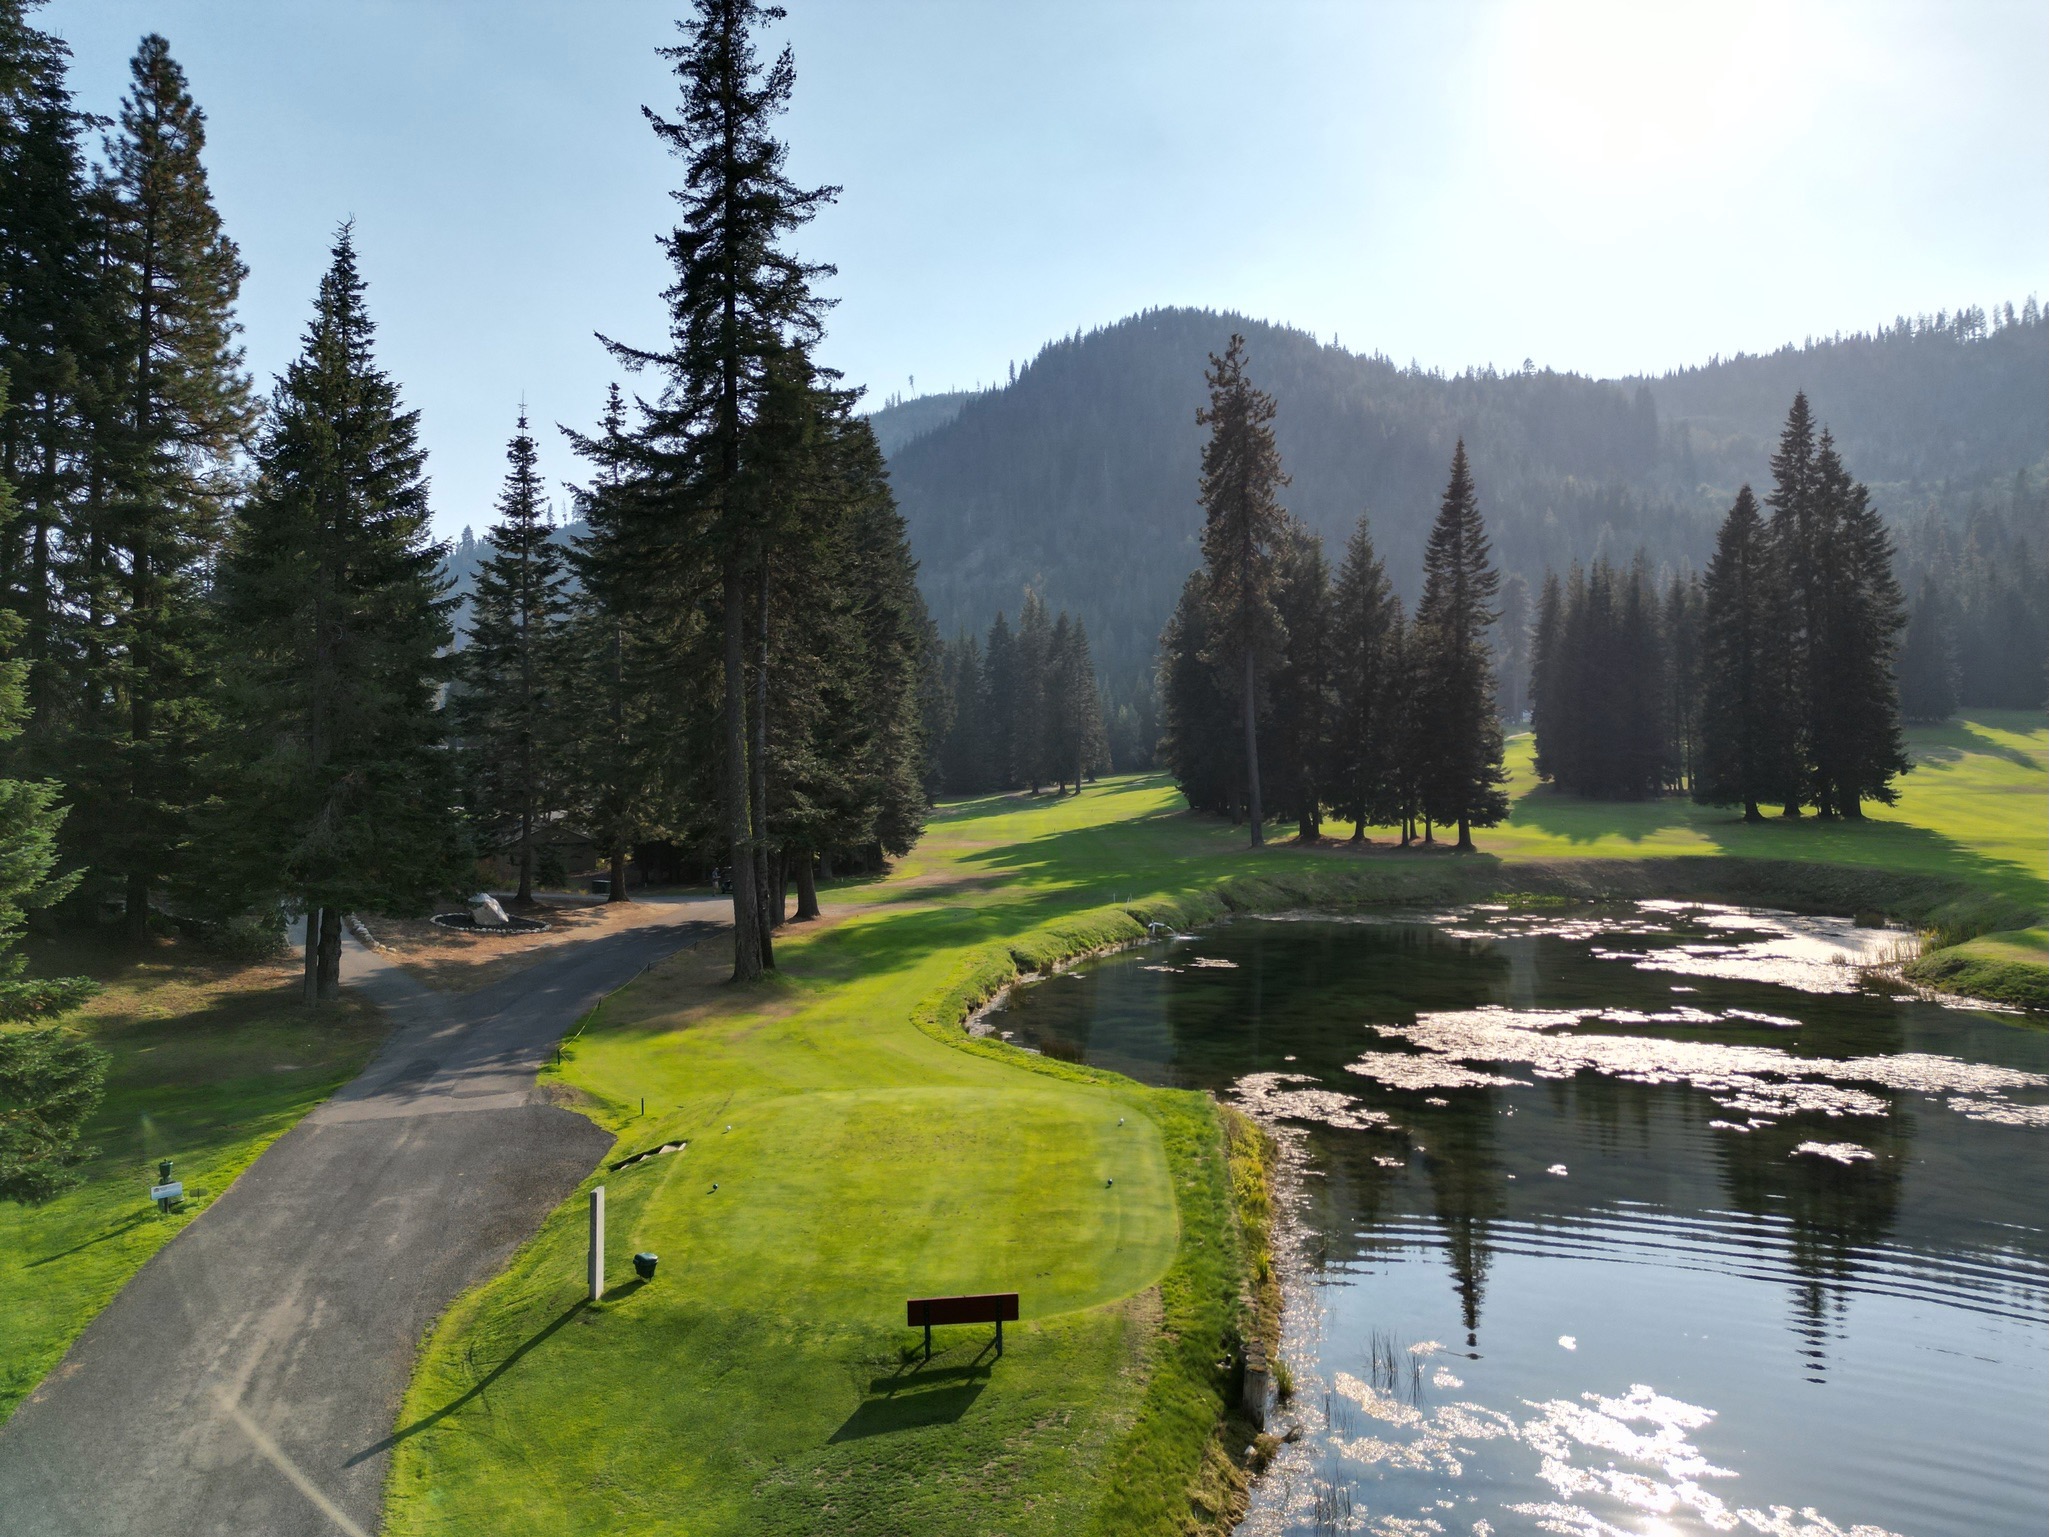
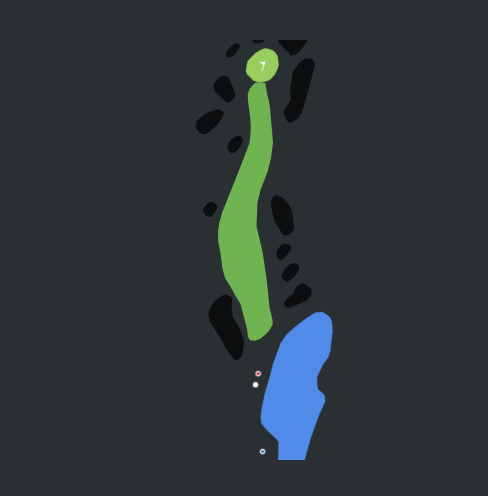
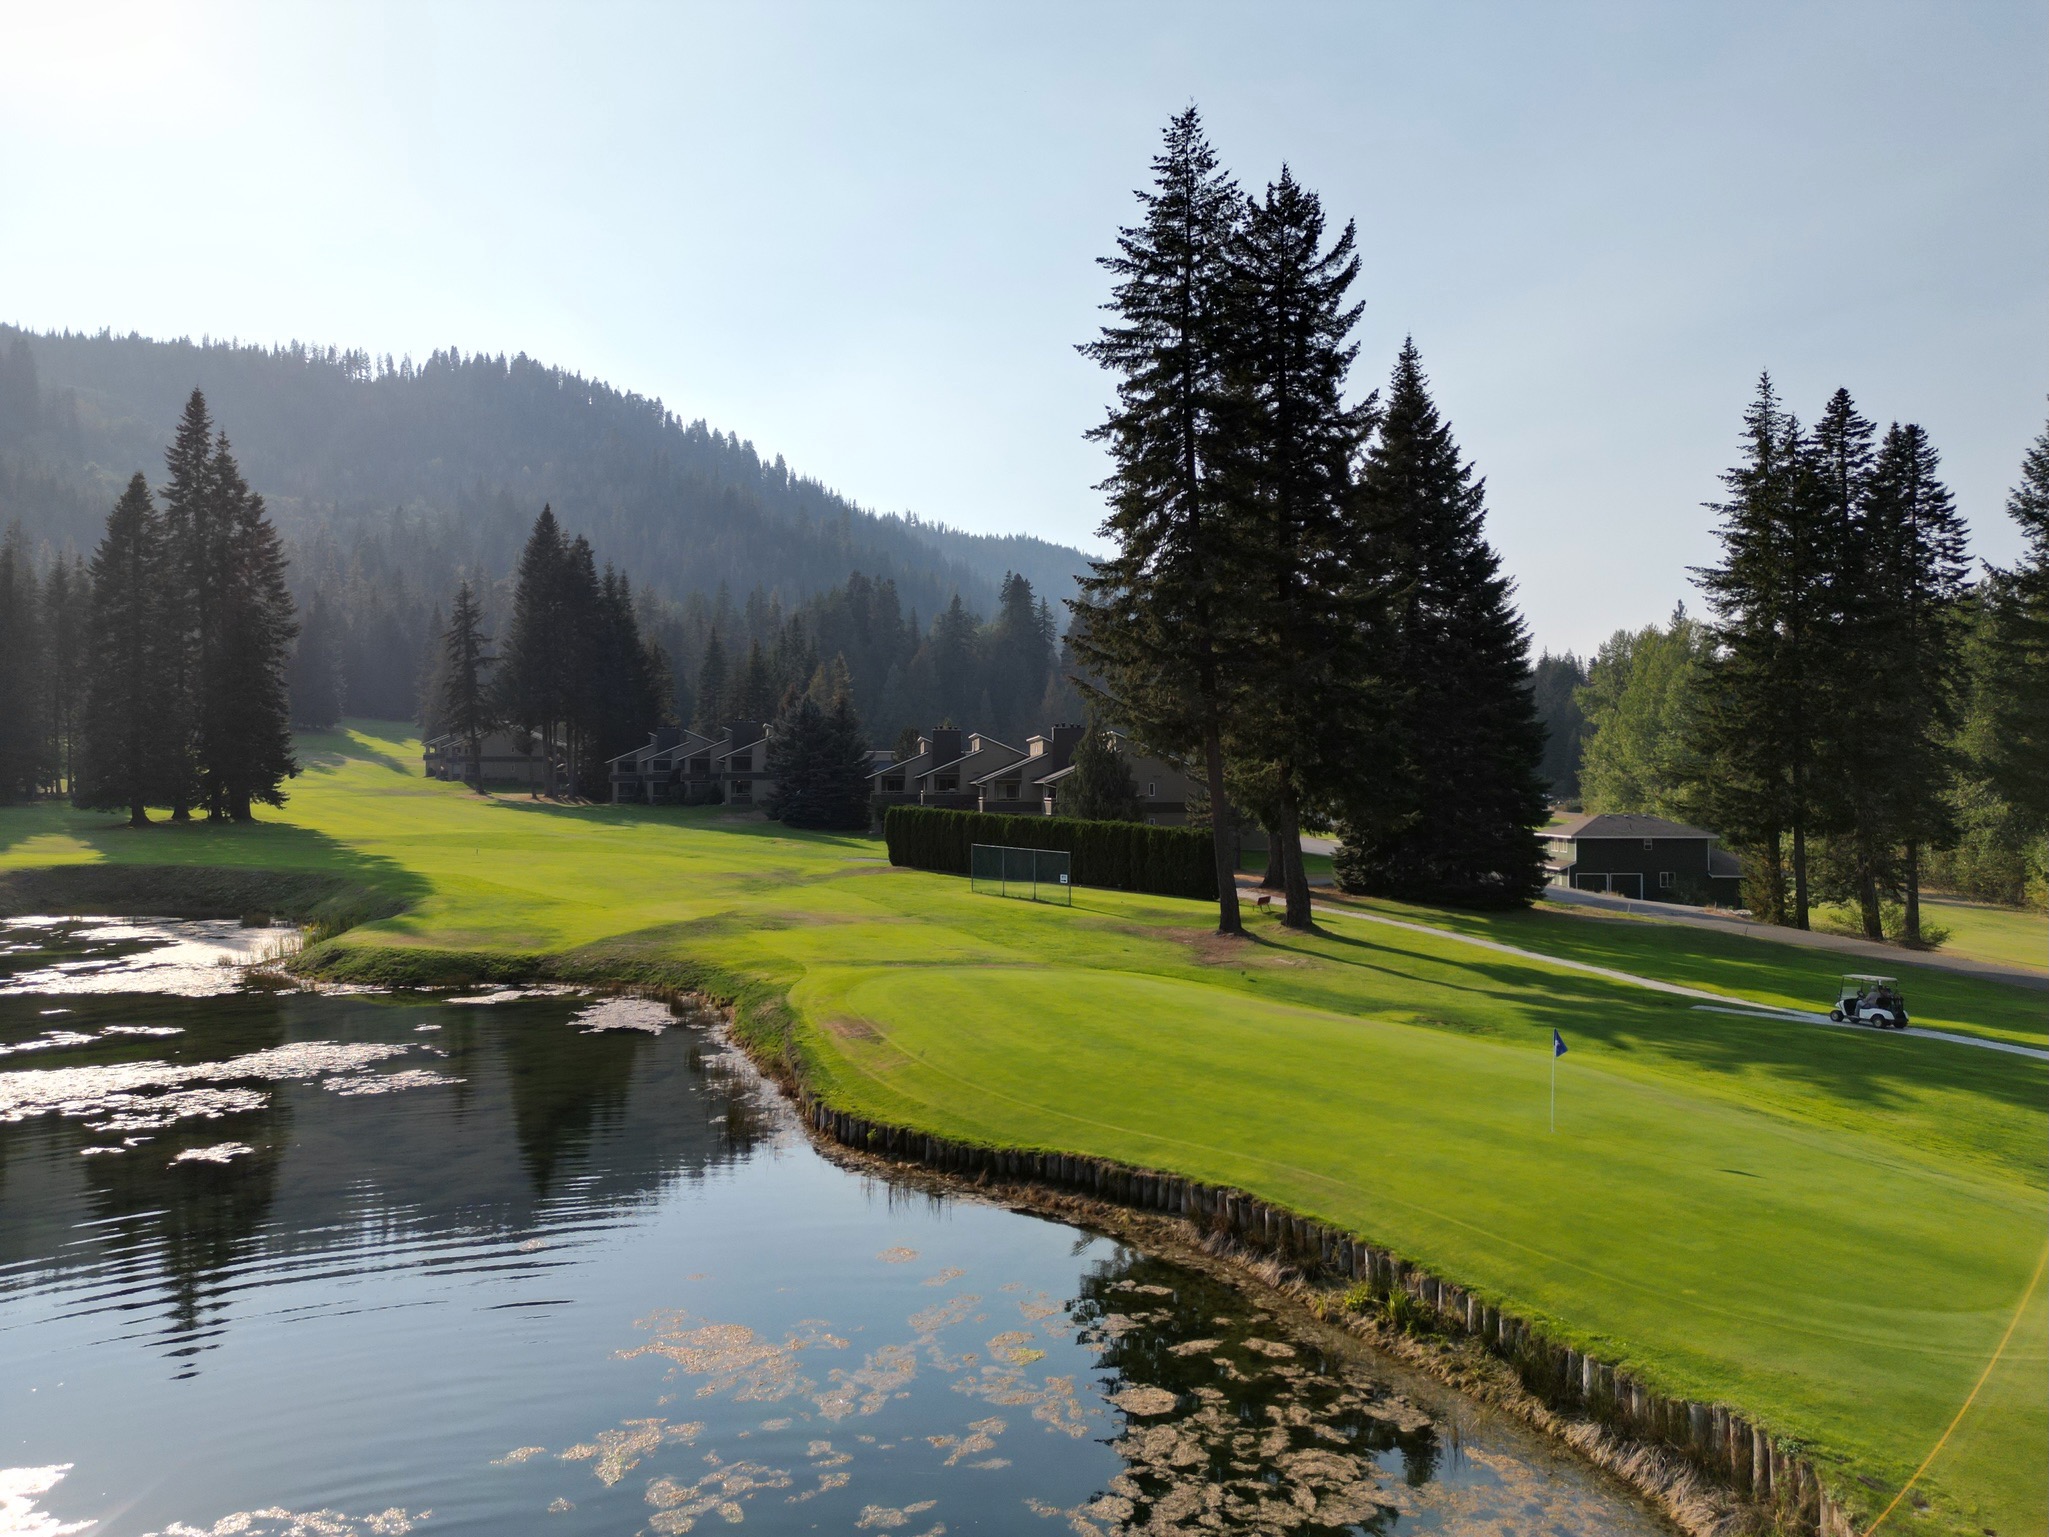
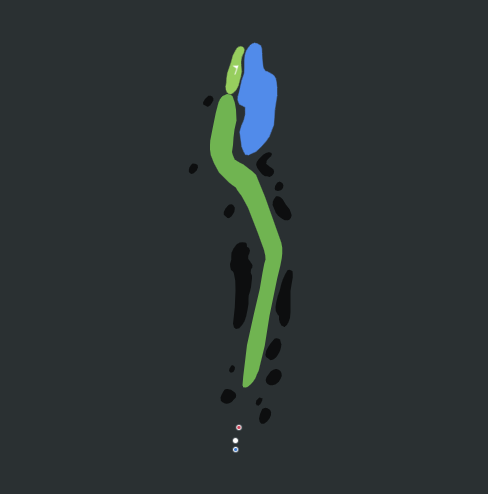
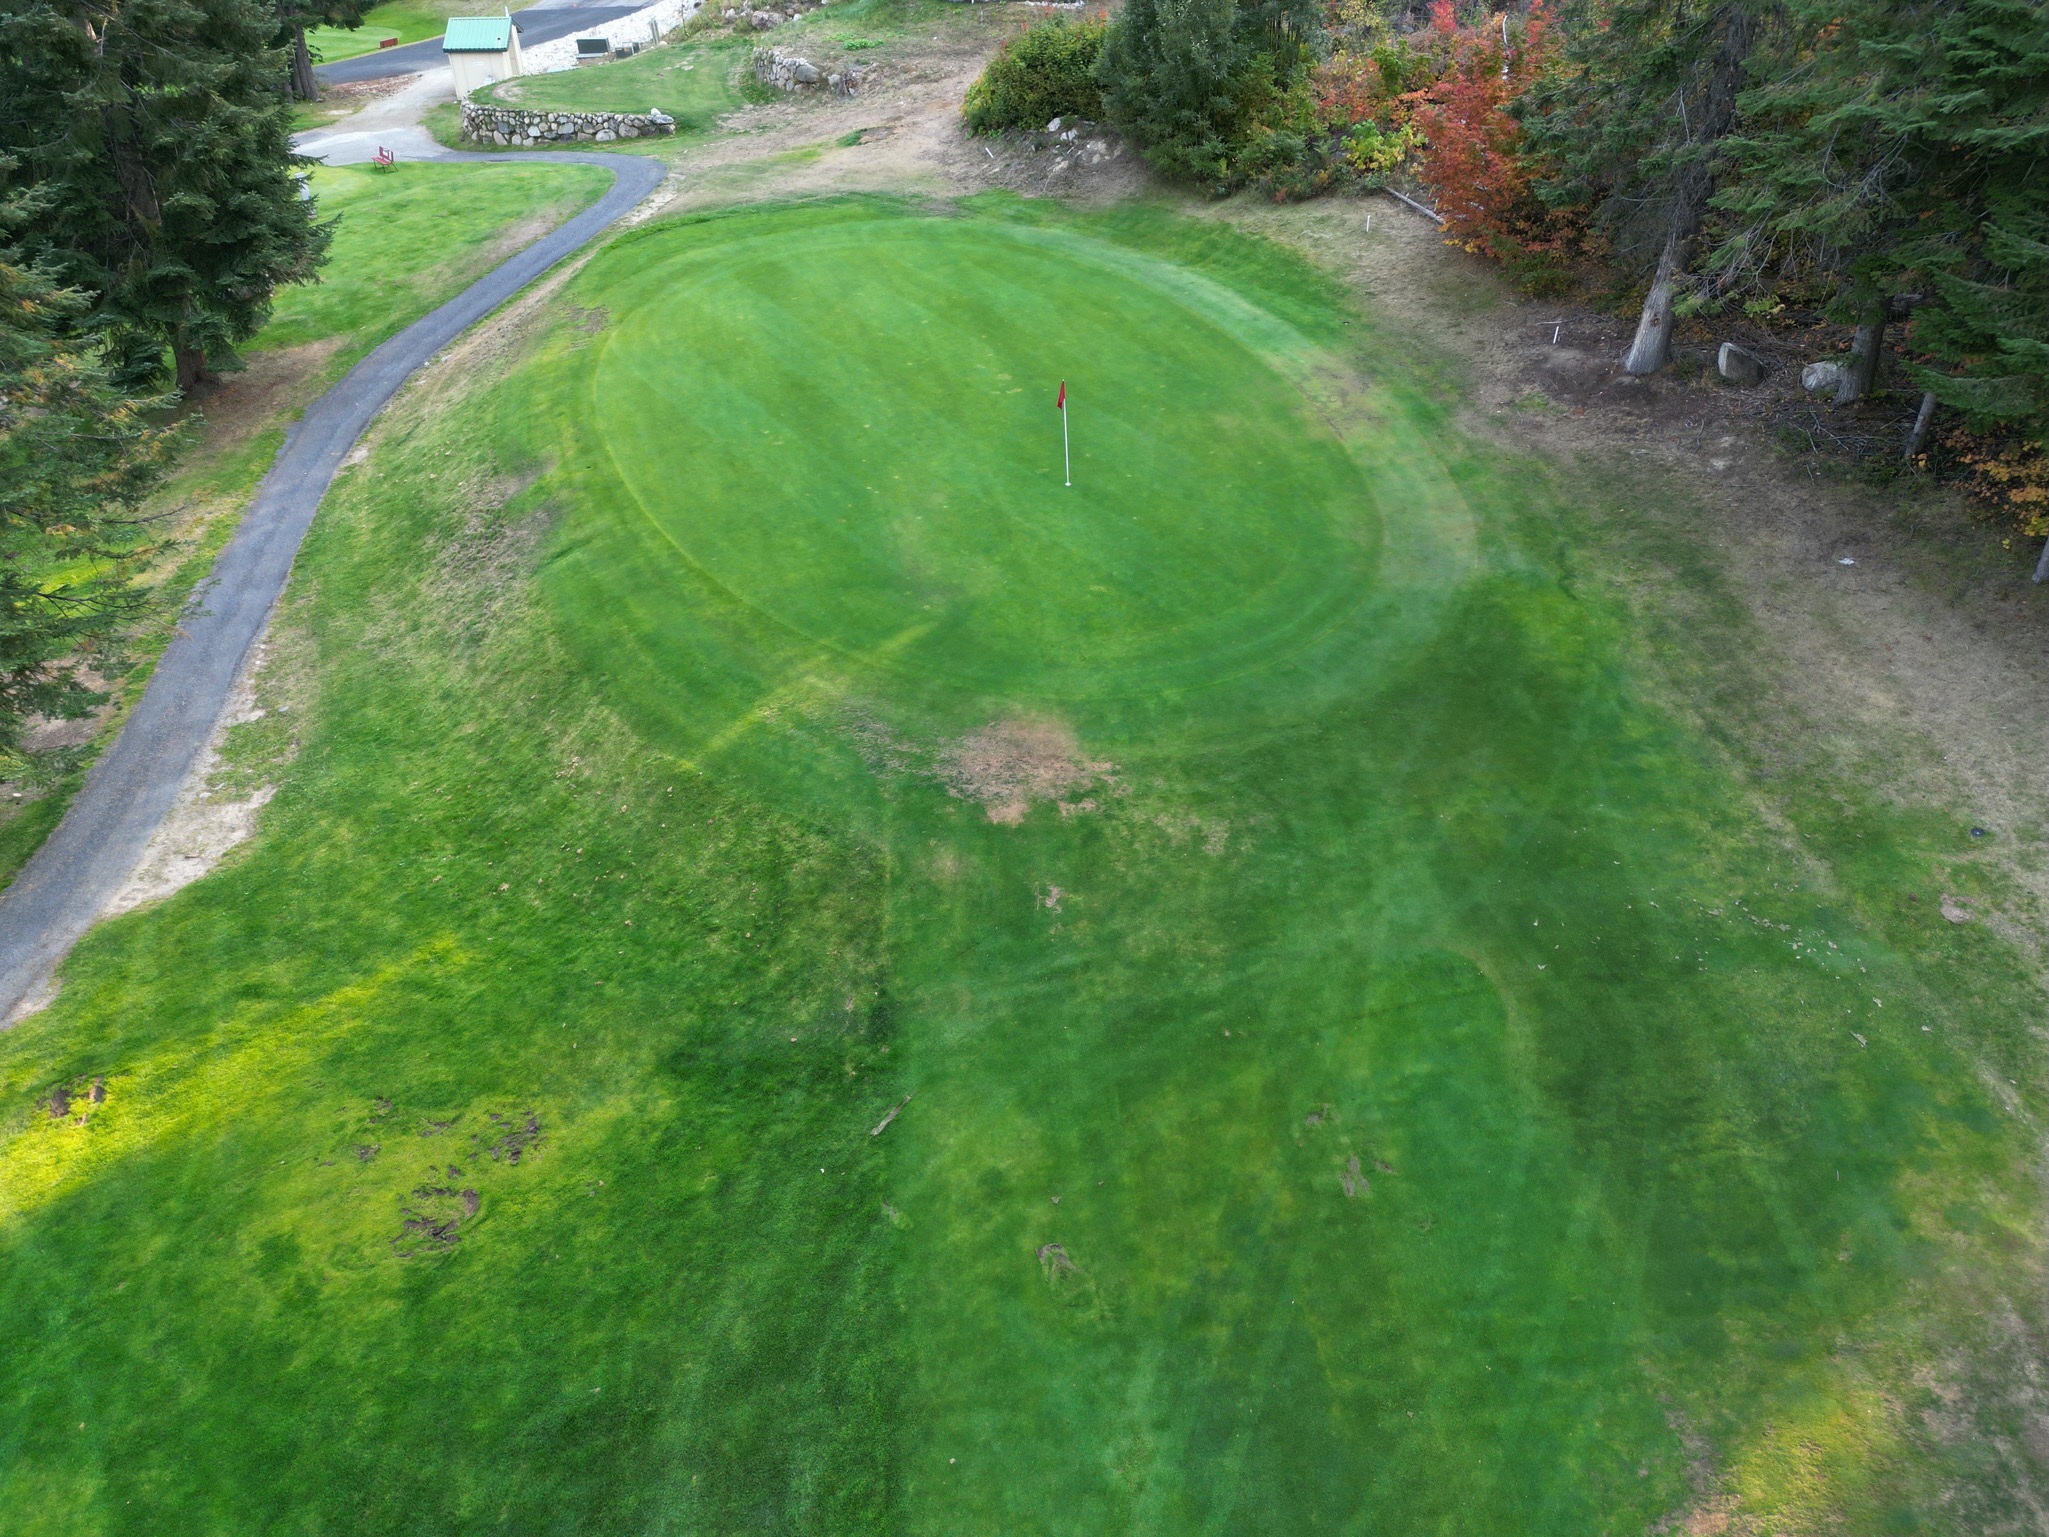
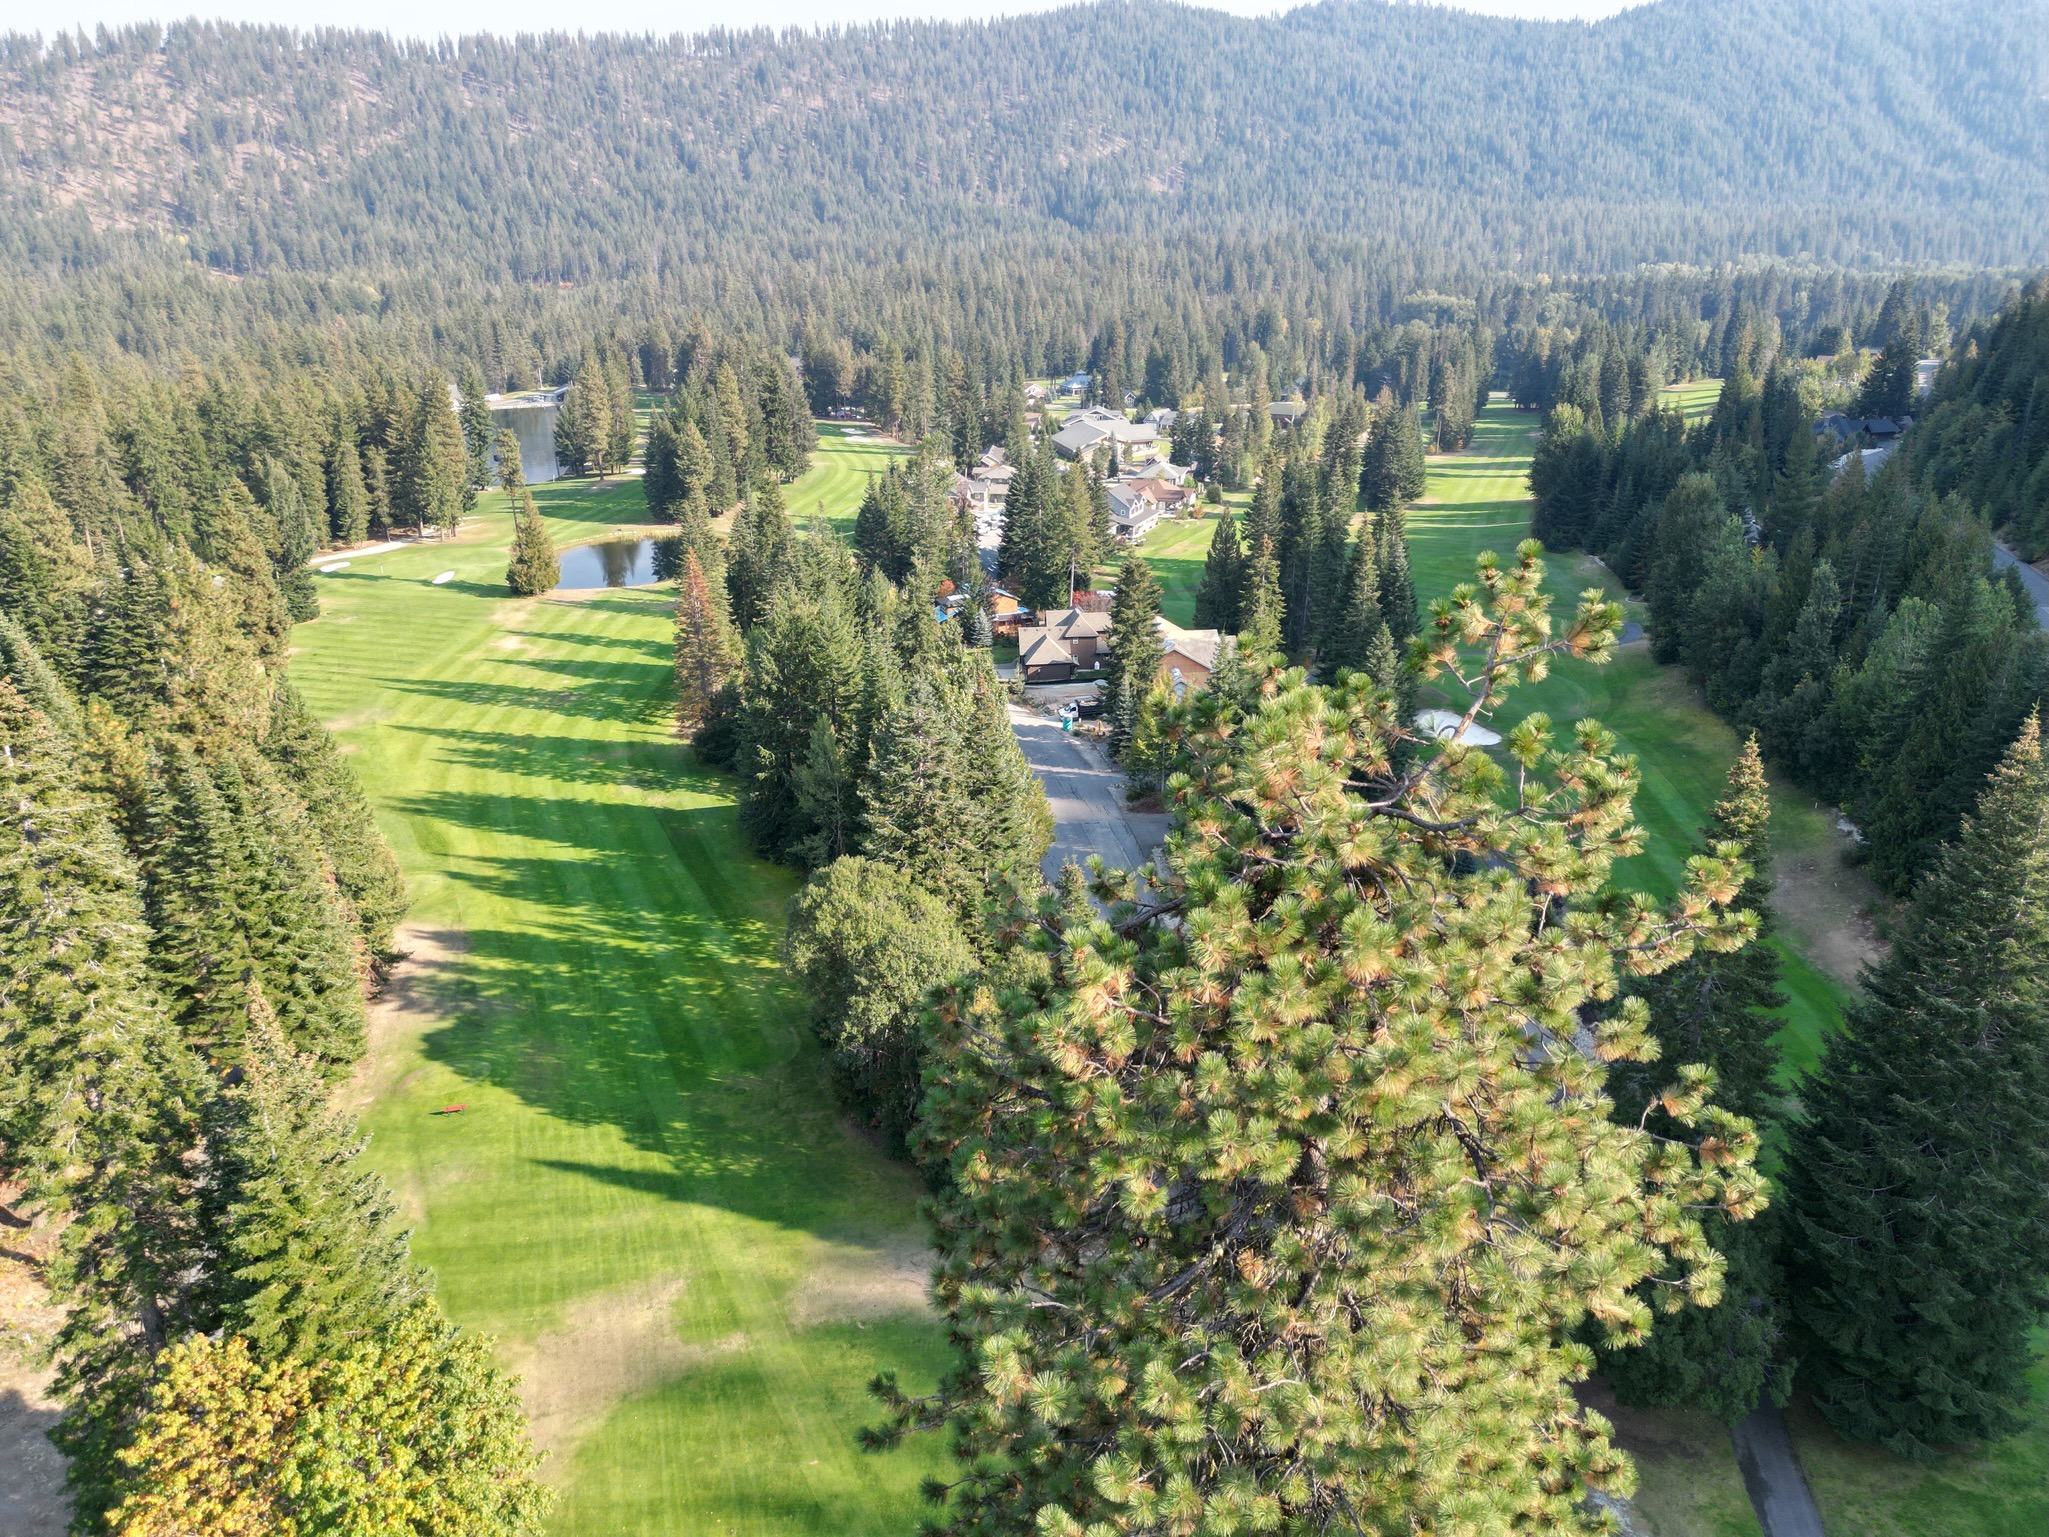
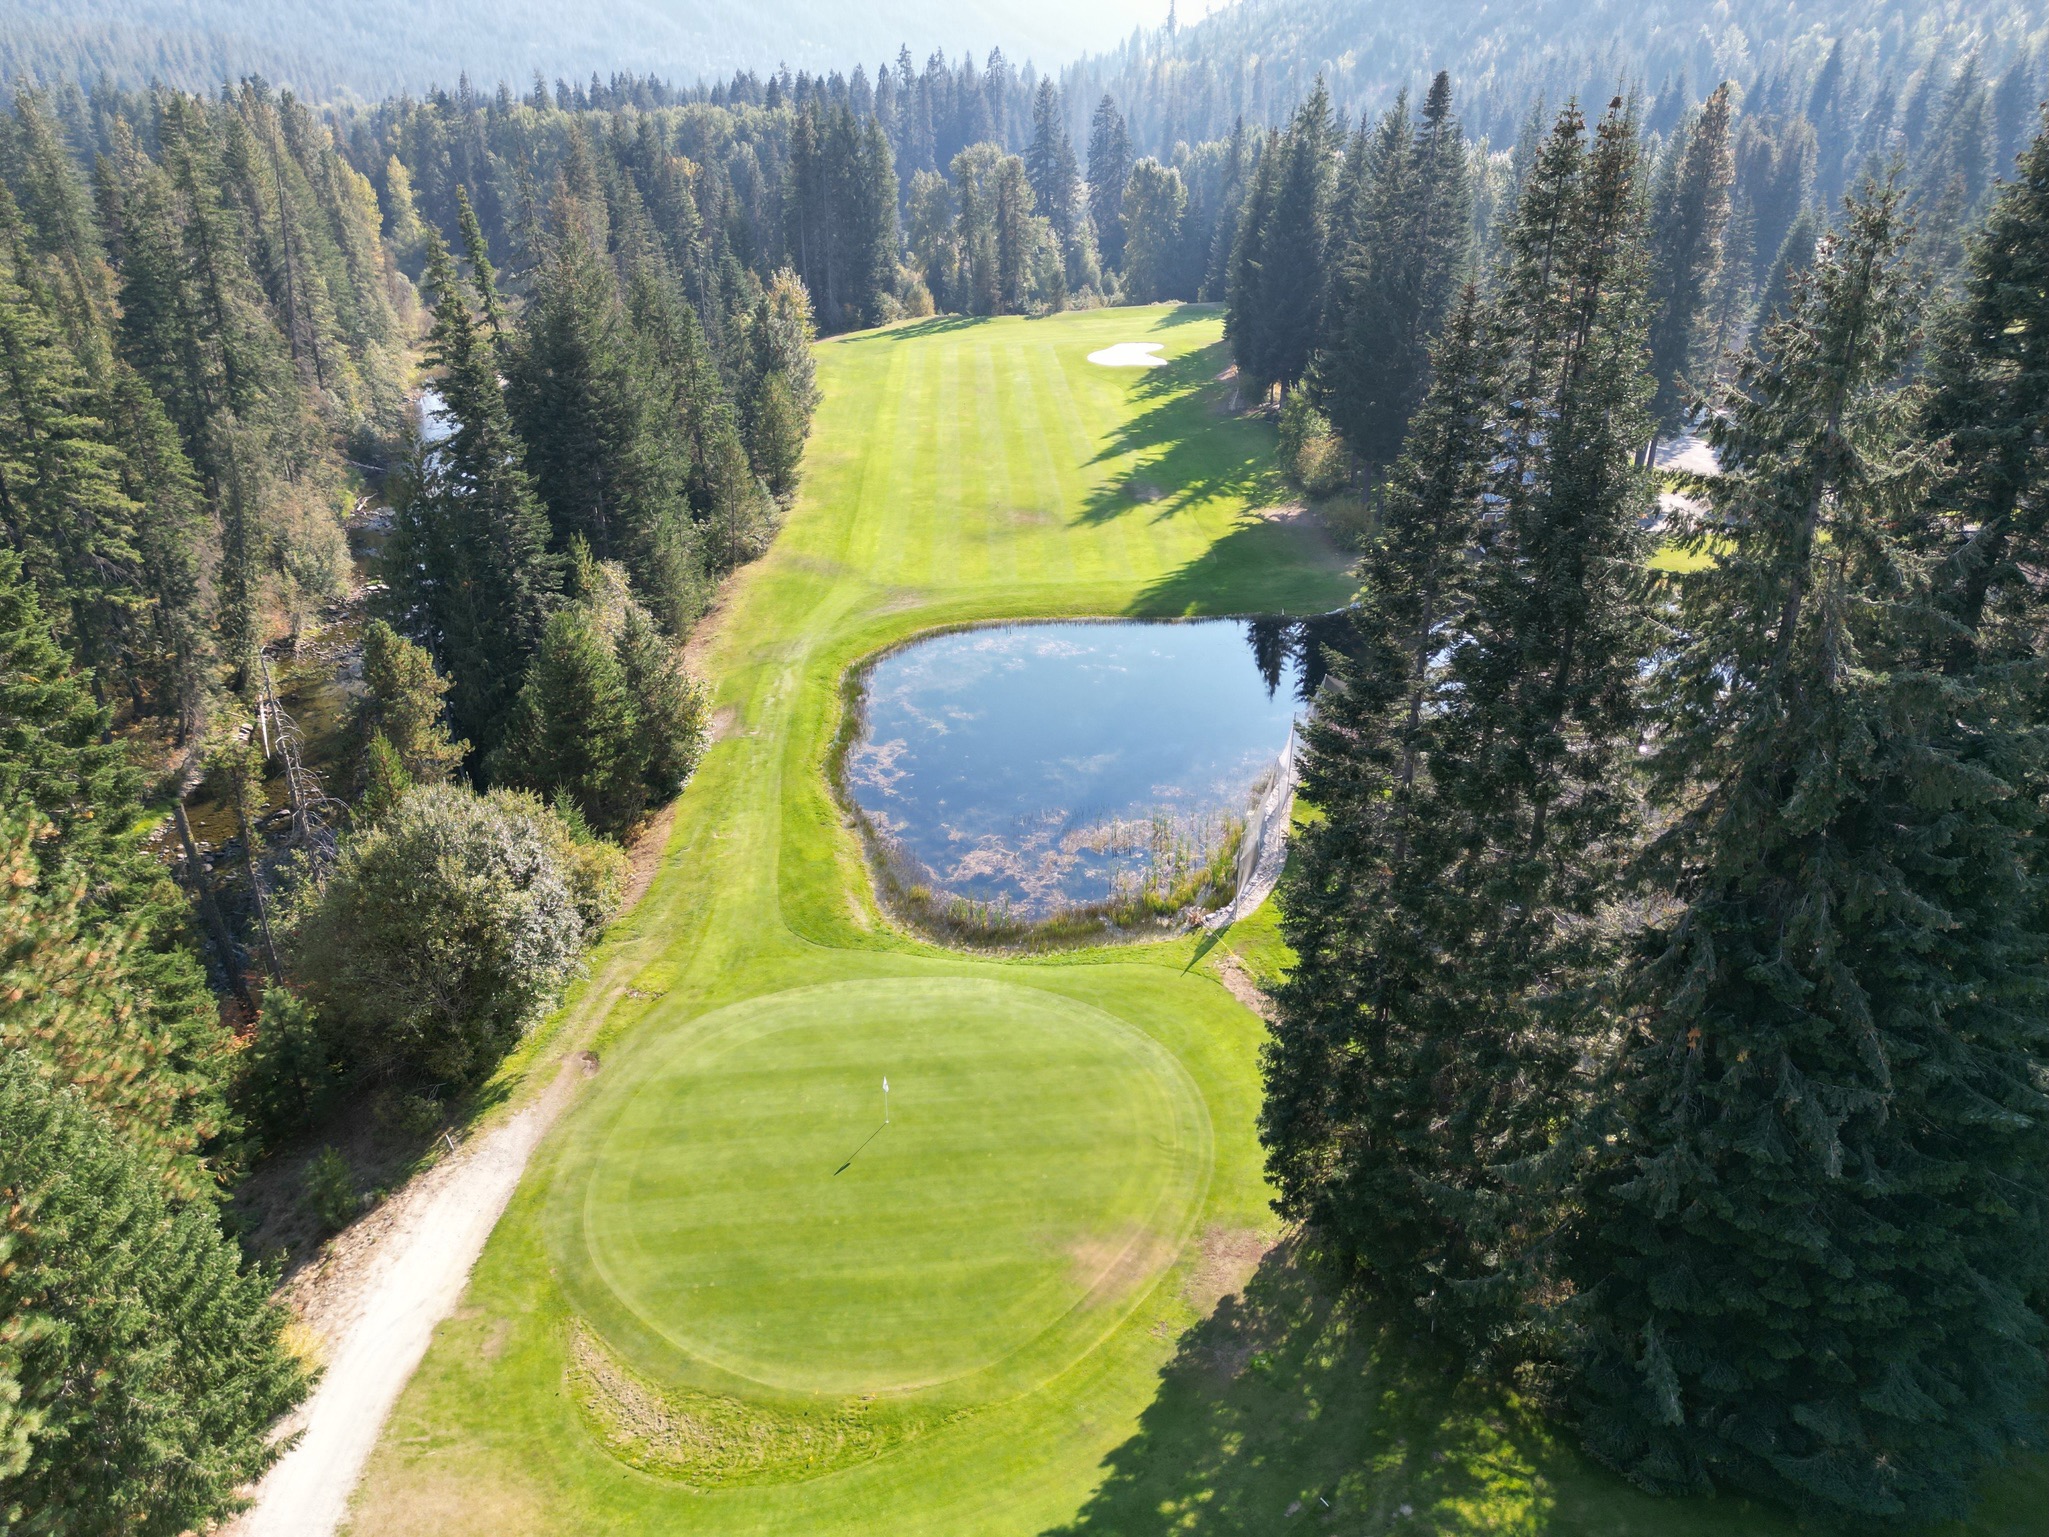
Hole 16
-
Our most beautiful, yet challenging par 3, with a water hazard. Out of bounds lines the whole right side. The steep hill on the left of the green can be your friend. A lot of ‘holes In 1’ have started by hits landing on the hill. The play is to hit your tee shot off the hillside on the left and let the ball feed down to the green. The elevated tee gives you the perfect view of the mountains & a peek-a-boo of the river below.
- View Interactive Map
- Par: 3
- 174 yds
- 152 yds
- 110 yds
- 110 yds
- Hcp: 18 / 14
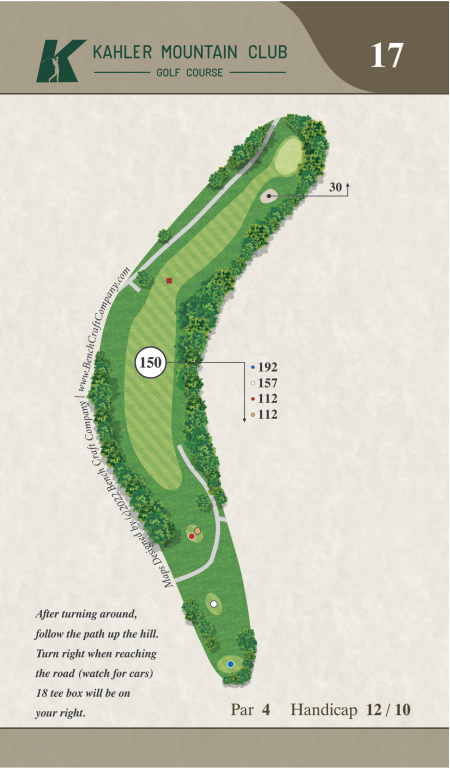
Hole 17
-
Elevated tees hit to the corner on this dogleg will set you up for a beautiful approach to the green. Hill side drops off on the right, with a steep hill on the left after your drive. Hit the green with accuracy to avoid the drop off at back & right to the green.

- View Interactive Map
- Par: 4
- 342 yds
- 307 yds
- 262 yds
- 262 yds
- Hcp: 12 / 10
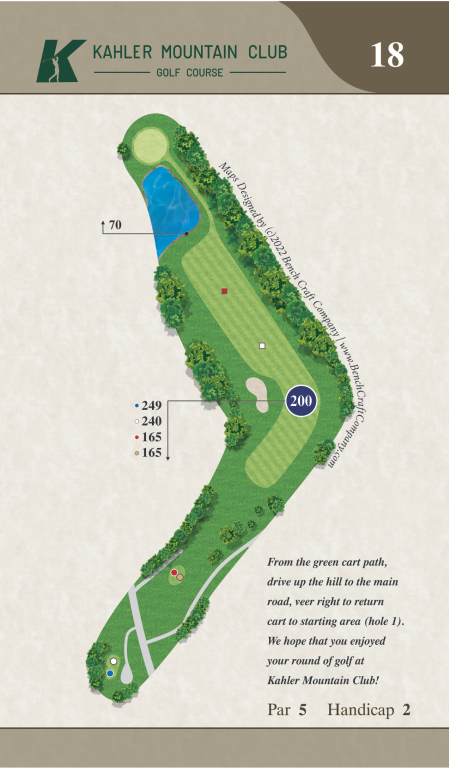
Hole 18
-
Out of bounds line the right side of this risk/reward hole. Your tee shot should be straight just past & near the right side of the fairway bunker. This is the corner opening up the rest of the hole. If you are a long accurate hitter, you may want to ‘go for it’ or play it safe & lay up before the water.

- View Interactive Map
- Par: 5
- 449 yds
- 440 yds
- 365 yds
- 365 yds
- Hcp: 2